
15 Essential Carpenter Tools Every Woodworker Should Know (2026 Guide)
Last Updated: July 2026
Reading Time: 40 minutes
Every well-built cabinet, tight-fitting joint, and square door frame starts with the same thing: the right tool, used correctly, in the right hand. Before power tools ever entered a workshop, carpenters were producing furniture and framing that has outlasted generations — and they did it with a compact set of hand tools they understood inside and out. This guide walks through those tools in the order a working carpenter actually reaches for them, explains the mechanical principle behind each one, and gives you the buying, maintenance, and safety knowledge that separates someone who owns tools from someone who can actually use them.
What Are Carpenter Tools? (Definition & Overview)
Carpenter tools are the hand-operated instruments used to measure, mark, cut, shape, join, and finish wood. They form the physical vocabulary of carpentry — the same way a set of kitchen knives forms the vocabulary of cooking. A tool doesn’t need a motor to be precise; it needs the right geometry, the right material, and a user who understands why it works.
At its core, carpentry is a sequence of five actions repeated in different orders on every project: measuring, marking, cutting, shaping, and fastening. Every tool in this guide exists to perform one or more of those five actions well.
Hand Tools vs Power Tools — Why Hand Tools Still Matter
Power tools win on speed. Hand tools win on control, silence, portability, and feel. A cordless circular saw will rip a sheet of plywood faster than any hand saw, but a block plane will take a paper-thin, glass-smooth shaving off a door edge in a way no power sander can replicate without risking gouges. Hand tools also don’t need batteries, don’t require dust collection, and give the user direct tactile feedback — you can feel when a chisel is cutting with the grain versus against it, something a router simply cannot tell you.
Professional carpenters don’t choose one over the other; they choose based on the task. Framing a house is power-tool territory. Fitting a hand-cut dovetail, scribing a piece to an uneven wall, or trimming a door by a sixteenth of an inch is hand-tool territory. A carpenter who only knows power tools hits a ceiling in precision work; a carpenter who only knows hand tools hits a ceiling in production speed. This guide focuses on the hand tools because they are the foundation everything else is built on — and because they are the tools most beginners underestimate and most professionals never stop relying on.
Categories of Carpenter Tools
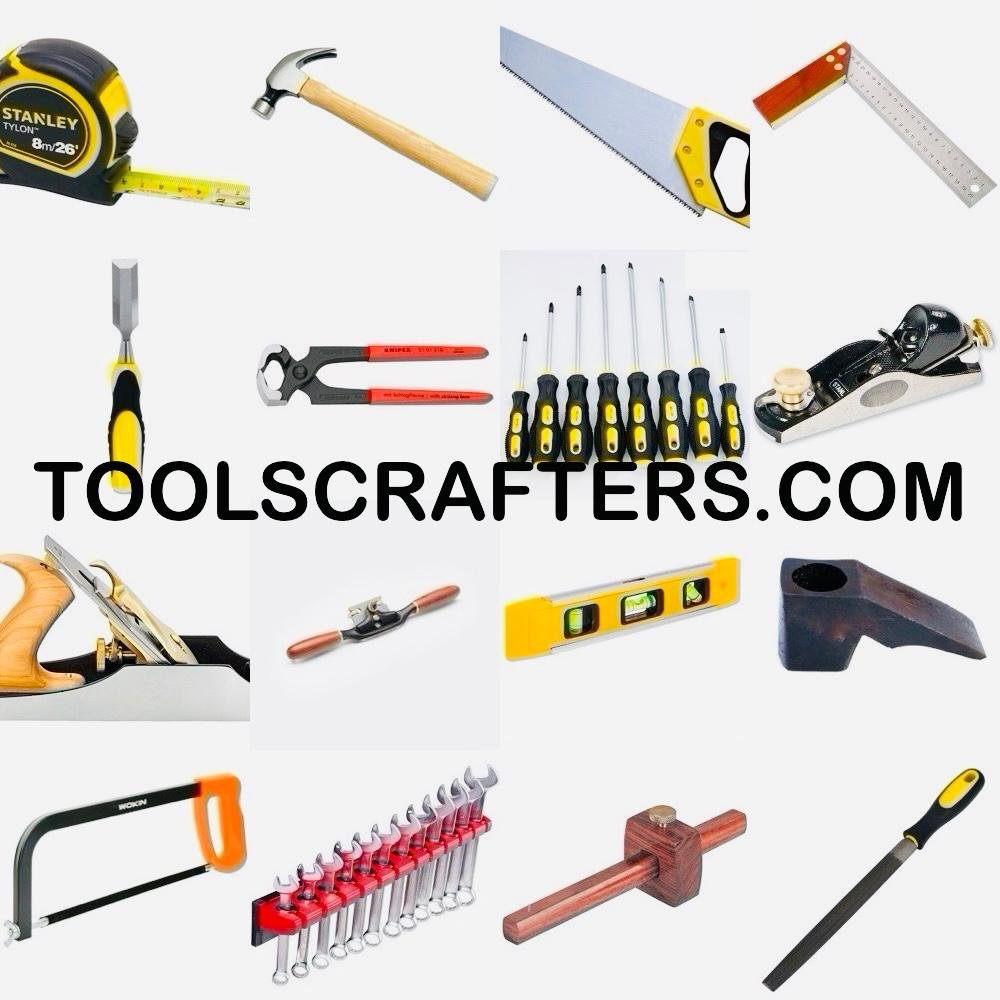
The 15 tools covered in this guide fall into five functional categories:
– Measuring tools — measuring tape, spirit level (establishing accurate dimensions and reference lines)
– Marking tools — carpenter square, marking tool (transferring measurements onto material)
– Cutting tools — hand saw, hacksaw, chisels, cutting nipper (removing or separating material)
– Shaping and smoothing tools — hand planer, big hand planer, half round file, basula (refining surfaces and dimensions)
– Striking and fastening tools — hammer, screwdrivers, spanner set (joining components together)
Understanding this categorization matters more than memorizing a list, because it tells you when to reach for a tool, not just what the tool is called.
How a Real Carpentry Project Uses These Tools
Categories explain what a tool is for. A real project explains what a tool is actually for — the order it gets picked up in, and why skipping a step causes problems three steps later. The clearest way to see that is to walk through a small, common build: a simple wall shelf, the kind of first project most beginners tackle before moving on to furniture.
Measure. The project starts with the measuring tape, because every other decision depends on it. Before any wood is touched, the wall space is measured for width, and the shelf board is measured against that number. This is the step most beginners rush, and it’s the step that determines whether the finished shelf actually fits — a shelf cut a few millimeters long won’t sit flush between two walls, and one cut short leaves a visible gap. The tape measure’s job here isn’t just recording a number; it’s establishing the one reference dimension everything downstream has to agree with.
Mark. With the length known, the marking tool comes out — for a rough project like this, a carpenter’s pencil is usually enough, but the principle is the same as fine joinery: the mark has to be precise and consistent on every piece. The board is marked at the measured length, and if the shelf uses support brackets or dado joints, the bracket positions are marked here too, transferred directly from the wall layout rather than re-measured from scratch. Re-measuring instead of transferring is a common source of small mismatches between parts that are supposed to be identical.
Check Square. Before a single cut is made, the carpenter square is placed against the marked line. This step exists because a pencil line drawn freehand, even by an experienced hand, tends to drift slightly off perpendicular. The square doesn’t just confirm the line — it corrects it, giving a true 90-degree reference so the cut end will sit flat against the wall or mate cleanly with an adjoining piece. Skipping this step is invisible on a single board and very visible once two boards are supposed to line up.
Cut. Only now does the hand saw enter the sequence. The saw follows the squared line, cutting just to the waste side of the mark rather than directly on top of it — leaving a small margin that gets removed in the next step rather than trying to hit the exact final dimension in one pass. This is a deliberate habit, not caution for its own sake: sawn edges are rarely perfectly smooth or perfectly square, so cutting to the line and then refining afterward produces a better result than trying to cut to final size in one stroke.
Plane. The hand planer takes over where the saw leaves off. A few light passes remove the slightly rough, slightly uneven surface the saw left behind and bring the cut edge down to the exact marked line — the “waste side” allowance from the cutting step gets consumed here. This is also where the edge gets trued: the plane, guided by feel and periodically checked with the square, removes any remaining deviation from square that the saw introduced.
Chisel. If the shelf design includes a housed joint — a shallow notch (dado) that the shelf board sits into, or a mortise for a bracket — the chisel does the work the saw and plane can’t. A saw can define the walls of a notch, but a chisel is what clears the waste material inside it and leaves flat, controlled surfaces at the bottom and sides. This is precision work: the chisel follows lines already established by the marking tool, not new lines of its own.
File. Once the joint is cut and the board is cut to length, the half round file cleans up what’s left — easing sharp corners on the shelf’s front edge so it isn’t uncomfortable or prone to splintering, and smoothing any burrs left on bracket hardware if metal brackets are being used. The file is a finishing tool here, not a shaping one; by this point, the shape is already correct.
Assemble. The hammer and screwdriver come in together at this stage. Brackets get screwed to the wall studs, and the shelf board gets fastened to the brackets — often with a combination of pilot-drilled screws and, in traditional builds, a few finish nails set with the hammer for extra rigidity. This is also where a spanner set would appear if the brackets use bolted hardware rather than wood screws.
Level. Before final fastening is tightened down completely, the spirit level goes on top of the shelf board. This step happens before full assembly is locked in, not after, because it’s far easier to shim or adjust a bracket position while screws are still loose than to fix a visibly tilted shelf once everything is tight.
Final Inspection. The last pass is a walk back through the earlier steps: check the shelf is level end-to-end, check the front edge is straight and square to the wall, check that fasteners are seated and none are proud of the surface, and check joints for gaps. This inspection is where the carpenter square and spirit level get used one more time — not to build anything new, but to verify the sequence above was actually followed correctly.
What this sequence demonstrates is that no tool on this list works in isolation. A sharp chisel doesn’t compensate for a bad measurement, and a perfectly flat plane doesn’t fix a joint that was marked off-square. Each tool depends on the accuracy of the one before it, which is exactly why the order — measure, mark, check, cut, shape, assemble, verify — rarely changes from project to project, whether it’s a simple shelf or a full set of furniture.
The History and Evolution of Carpenter Tools
Modern carpenter tools are refinements, not inventions. Nearly every tool in a 2026 toolbox has a direct ancestor thousands of years old, and understanding that lineage explains why certain tool shapes have never changed.
Ancient and Traditional Woodworking Tools
The earliest carpentry tools were shaped from stone, bronze, and later iron. Adzes — the direct ancestor of the basula covered later in this guide — appear in archaeological records from ancient Egypt, used to hew logs into flat beams long before the saw was common. Chisels made of bronze and later hardened steel appear in Egyptian and Roman toolkits in forms barely different from what a cabinetmaker uses today. The physics of a wedge splitting wood fiber hasn’t changed; only the metallurgy has.
Industrial Revolution and Mass-Produced Tools
Before the 1800s, most tools were handmade by blacksmiths or by the carpenters themselves, which meant quality and availability varied enormously by region and craftsman. The Industrial Revolution introduced standardized manufacturing, interchangeable parts, and — critically — consistent steel quality. This is when tools like the modern claw hammer, the steel try square, and factory-ground chisels became affordable and consistent enough for the average tradesperson to own a full set rather than inherit a handful of pieces.
Modern Carpenter Tools in 2026
Today’s hand tools benefit from materials that didn’t exist a century ago: chrome vanadium steel that resists wear far longer than plain carbon steel, fiberglass and composite handles that won’t crack from humidity the way old hickory sometimes did, and precision manufacturing tolerances that make a $20 combination square meaningfully more accurate than a $20 square would have been in 1960. What hasn’t changed is the underlying skill required to use these tools well — no amount of manufacturing precision replaces a steady hand and an understanding of the material.
> Did You Know? The word “carpenter” comes from the Latin carpentarius, originally referring to a maker of carriages (carpentum). The trade’s name literally predates most of the tools we now associate with it.
Who Needs This Guide?
This guide is written to serve several audiences at once, because the same 15 tools matter to all of them — just for different reasons.
Beginners and DIY Enthusiasts
If you’re assembling your first toolbox, this guide tells you what to buy first, what to skip initially, and how to avoid the common trap of buying an expensive tool you don’t yet know how to use correctly.
Professional Carpenters and Tradespeople
Working carpenters will find this useful less as an introduction and more as a reference — buying considerations, maintenance intervals, and safety reminders that are easy to let slip after years on the job.
Furniture Makers and Hobbyists
Furniture work leans harder on precision tools like chisels, marking tools, and planes than framing work does. This guide highlights which of the 15 tools deserve the most investment if fine joinery is your focus.
Students and Apprentices
If you’re in a trade program, this guide is structured to mirror how tools are typically taught: starting with measuring and marking, moving through cutting and shaping, and ending with fastening — the same logical order most curricula follow.
How to Build Your First Carpenter Toolkit
Buying all 15 tools at once is rarely necessary and often wasteful. A smarter approach is to build a toolkit in tiers, adding tools as your projects demand them.
Starter Toolkit
For someone doing basic home repairs and simple builds, the essential starting point is: a measuring tape, a combination square, a claw hammer, a set of screwdrivers, and one general-purpose hand saw. These five tools alone will handle the majority of beginner DIY projects — shelving, small repairs, basic framing.
Intermediate Toolkit
Once you’re building furniture or doing finish carpentry, add: chisels, a marking tool, a spirit level, a block plane, and a spanner set. This is the point where precision starts to matter more than raw capability.
Professional-Grade Toolkit
A full working toolkit adds the remaining specialty tools: a hacksaw for metal fasteners and pipe, a cutting nipper, a big hand planer (jack or jointer plane) for dimensioning stock, a half round file for shaping and deburring, and — for traditional or timber-frame work — a basula.
Toolkit Checklist by Project Type
– Basic home repairs: tape, square, hammer, screwdrivers, hand saw
– Furniture making: all of the above, plus chisels, marking tool, block plane, spirit level
– Framing and structural work: all of the above, plus hacksaw, spanner set, larger hand saw
– Traditional/timber framing: all 15 tools, with particular emphasis on the basula and big hand planer
Buying Your First Carpenter Tools Without Wasting Money
The most expensive mistake a beginner can make isn’t buying a cheap tool — it’s buying the wrong tool at the wrong time. Most people who abandon a new hobby toolbox in a drawer didn’t fail because they lacked equipment; they bought equipment that didn’t match what they were actually doing yet.
Which tools to buy first. Buy for the projects you already have planned, not the projects you might do someday. A measuring tape, a combination square, a claw hammer, a basic screwdriver set, and one decent crosscut saw will get a beginner through the vast majority of early home projects. These five tools also happen to be the ones with the shortest learning curve — you’ll get accurate, usable results from them almost immediately, which matters for staying motivated.
Which tools can wait. Specialty tools earn their place once a specific project demands them, not before. The basula is the clearest example: it’s a powerful tool for hewing rough timber, but a beginner doing furniture repairs or shelving has no real use for it yet. The same logic applies to a jointer-length big hand planer, a full spanner set, and even a hacksaw if your early projects don’t involve cutting metal hardware. Buying these early means money spent on tools that sit unused while the ones you actually need get the budget-brand treatment instead.
Cheap vs quality tools. Not every tool needs to be premium, but not every tool tolerates being cheap either. Simple mechanical tools — tape measures, squares, screwdrivers — have a low ceiling for how much a bigger budget improves them, because there’s not much precision manufacturing can add to a fixed 90-degree angle or a spring-loaded reel. Edge tools are the opposite case: a cheap chisel or a cheap hand saw is genuinely worse to use, not just less durable, because poor steel won’t take or hold an edge properly no matter how carefully you sharpen it. If you’re going to spend more on anything early, spend it on the tools with a cutting edge.
Why large tool kits are often a bad investment. The all-in-one 50-piece or 100-piece tool sets sold at big box stores are optimized for looking complete on a shelf, not for being useful in a workshop. They typically bundle a handful of genuinely useful tools with a large number of low-grade, rarely-used pieces, and the steel quality across the whole set is usually mediocre because the manufacturing budget is spread thin across dozens of parts. A beginner is almost always better served buying five or six individual, decent-quality tools than one large boxed set at a similar total price.
Quality over quantity. A short list of tools you trust and understand will outperform a long list of tools you’re unsure about. This isn’t just a budgeting principle — it’s a skill-building one. Using the same handful of quality tools repeatedly is how you learn their feel, their limits, and their maintenance needs, and that familiarity is worth more early on than having a tool for every conceivable situation.
When professionals upgrade. Working carpenters typically upgrade a tool for one of three reasons: the current one is genuinely limiting their work (a saw that won’t hold a straight cut, a plane that can’t be tuned flat), the current one has reached the end of its serviceable life, or a specific new project type demands a tool they don’t yet own. Upgrading rarely happens simply because a newer or more expensive version exists — professional tool budgets are driven by need, not novelty, which is a useful mindset for beginners to adopt early.
Buy First, Buy Later
| Buy First (Starter) | Buy Next (Intermediate) | Buy Later (Specialty) |
|—|—|—|
| Measuring Tape | Chisels | Hacksaw |
| Carpenter Square | Marking Tool | Cutting Nipper |
| Hammer | Spirit Level | Big Hand Planer (jack/jointer) |
| Screwdrivers | Hand Planer (block plane) | Half Round File |
| Hand Saw | Spanner Set | Basula (Adze) |
—
Affiliate Disclosure: Some links in this article are affiliate links. This means TOOLSCRAFTERS may earn a small commission if you purchase through these links, at no extra cost to you. We only recommend products that we believe offer value based on our research and evaluation.
The 15 Essential Carpenter Tools (Complete Breakdown)
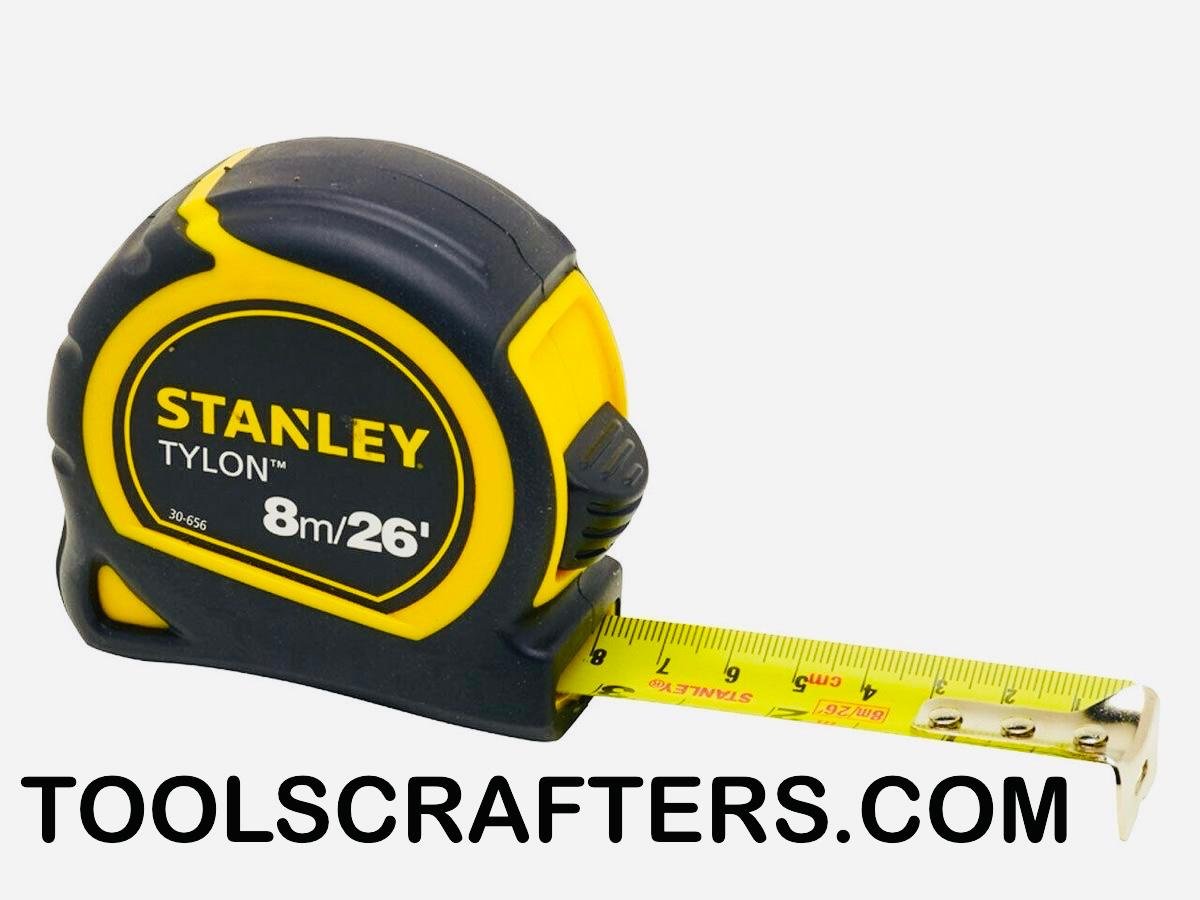
1. Measuring Tape
What It Is: A retractable steel or fabric ruler used to measure length, wound inside a compact case with a locking mechanism.
Purpose & Working Principle: A measuring tape works on a simple spring-loaded reel principle — the blade retracts automatically, while a lock holds it extended at a chosen length. The hook at the end is intentionally designed with a small amount of play (often called “hook slop”), which compensates for the thickness of the hook itself so the tape reads accurately whether you’re measuring by pushing the hook against a surface (inside measurement) or hooking it over an edge (outside measurement).
Types & Variations: Standard 25-foot tapes for general carpentry, compact 12–16 foot tapes for pocket use, long-reach 100-foot tapes for site layout, and metric versus imperial (or dual-scale) blades.
Common Uses: Measuring stock length before cutting, laying out framing dimensions, checking room dimensions, transferring measurements between locations.
Buying Considerations: Look for a wide, stiff blade (a “standout” of 8–10 feet without collapsing means it holds rigid for one-person use), a secure belt clip, and clear, high-contrast markings. Dual-marked tapes (metric and imperial) are worth the small price difference if you ever work with imported plans or hardware.
Maintenance: Wipe the blade clean of sawdust and resin after use; a dirty blade can jam the case or wear the coating. Avoid letting the blade snap back uncontrolled — retract it manually near the end to protect the hook rivets.
Safety: The retracting blade can cause minor cuts if released carelessly at full extension; always guide it back rather than letting it whip.
Common Mistakes: Misreading the hook’s intentional play as a manufacturing defect and trying to “fix” it, which throws off every measurement. Reading the wrong scale on dual-marked tapes. Forgetting to account for blade width when measuring inside a tight space.
Related Tools: Carpenter square (for transferring right angles), marking tool (for transferring the measured point).
> Pro Tip: Always measure from the same end of the tape for every cut on a single project. Switching between the hook end and a mid-tape reference introduces small, cumulative errors.
—
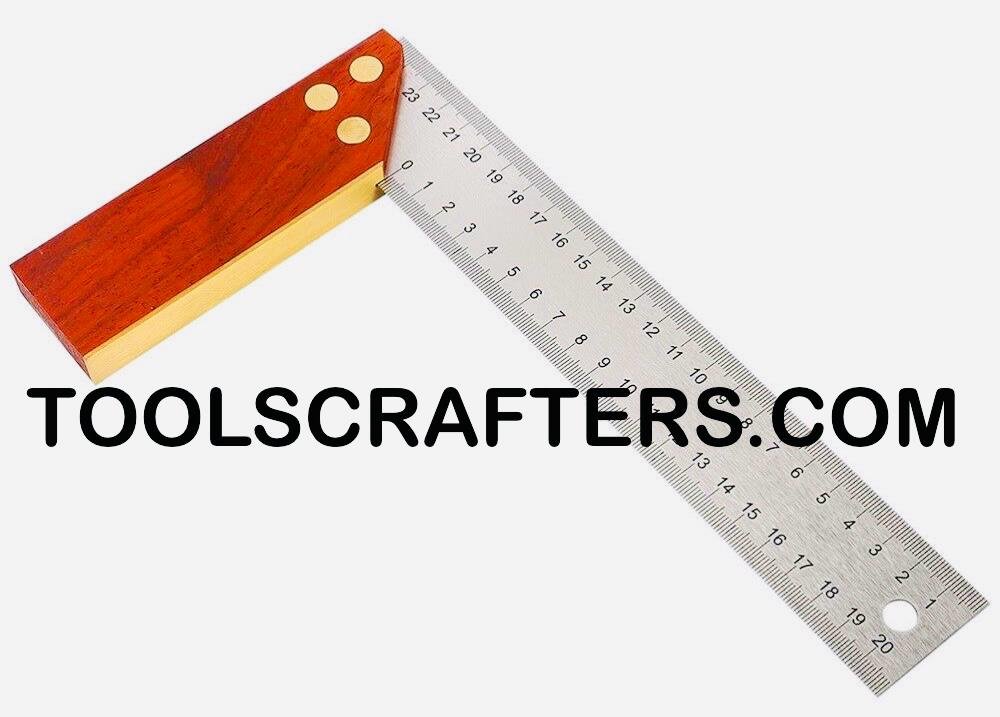
2. Carpenter Square
What It Is: An L-shaped or T-shaped tool used to check and mark 90-degree (and sometimes 45-degree) angles.
Purpose & Working Principle: The square relies on two fixed edges machined at a precise angle relative to each other. When one edge is held against a reference surface, the other edge shows you exactly where a true perpendicular line falls — critical because wood surfaces are rarely as straight as they look to the eye.
Types & Variations: The try square (small, fixed 90°, used for fine work), the framing square (large, flat, L-shaped, used for layout and roof framing calculations), and the combination square (adjustable ruler with a sliding head that checks 90° and 45° and can also act as a depth gauge and marking guide).
Common Uses: Checking that a cut end is square before assembly, marking cut lines perpendicular to a board’s edge, verifying that a frame or cabinet corner is true.
Buying Considerations: A combination square is the most versatile first purchase because it does the job of a try square, a depth gauge, and a marking guide in one tool. Check for a tight, non-wobbly slide on adjustable models — a loose head defeats the tool’s entire purpose.
Maintenance: Keep the tool dry to prevent rust on the blade; store it flat rather than tossed loosely in a bag where the edges can nick.
Safety: Minimal direct risk, but a damaged or bent square gives false readings that lead to bad cuts — treat accuracy checks as a safety issue, not just a quality issue.
Common Mistakes: Using a square that’s been dropped or bent without re-checking its accuracy against a known-true edge. Applying too much hand pressure while marking, which can shift the square off its reference edge mid-line.
Related Tools: Marking tool (works directly with the square to draw the line), measuring tape (establishes the point the square marks from).
> Workshop Insight: To check any square’s true accuracy, draw a line against a straight edge, flip the square over, and draw a second line from the same point. If the two lines don’t match exactly, the square is out of true.
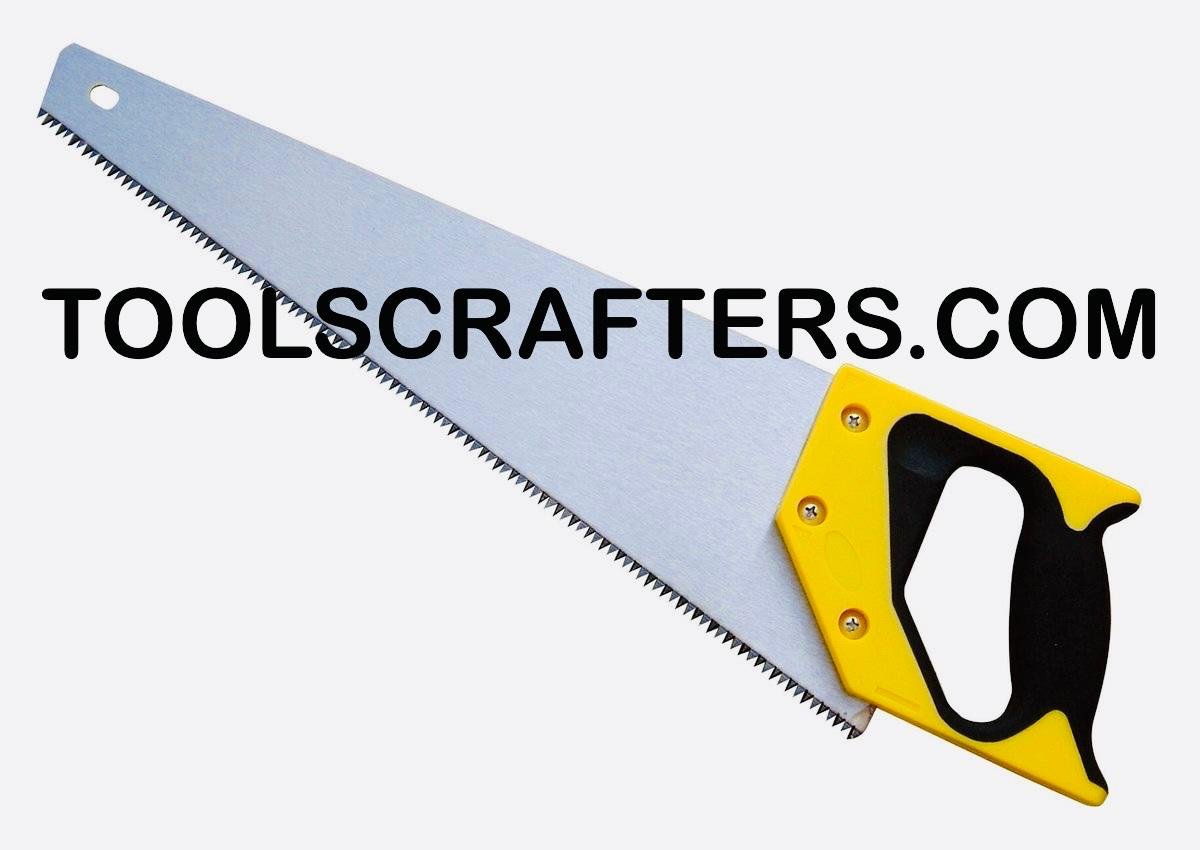
3. Hand Saw
What It Is: A single-blade saw with a handle, used to cut wood manually along a marked line.
Purpose & Working Principle: A hand saw cuts through shear action — each tooth acts as a tiny chisel, removing a small sliver of wood fiber with every stroke. The tooth geometry determines what the saw is good at: teeth filed to cut across the wood grain are shaped differently from teeth filed to cut along it.
Types & Variations: Rip saws (teeth designed to cut with the grain, used for lengthwise cuts), crosscut saws (teeth designed to sever fibers across the grain, used for cutting boards to length), and Japanese pull saws (cut on the pull stroke rather than the push stroke, producing thinner kerfs and often easier control for beginners). Saws are also classified by teeth-per-inch (TPI) — higher TPI gives a finer, slower cut; lower TPI gives a faster, rougher one.
Common Uses: Cutting boards to length, ripping stock to width, trimming trim and molding, general demolition and rough carpentry.
Buying Considerations: For a first saw, a crosscut saw with moderate TPI (around 8–10) handles the widest range of general tasks. Check handle comfort in hand before buying — a saw you can’t grip comfortably will always cut poorly, regardless of blade quality.
Maintenance: Keep the blade dry and lightly oiled to prevent rust; store with a blade guard or sheath. Sharpening a hand saw’s teeth is a specialized skill — many carpenters send saws out for professional sharpening rather than doing it themselves.
Safety: Always cut away from your body, keep your off-hand well clear of the cut line, and secure your workpiece firmly — an unsecured board that shifts mid-cut is one of the most common causes of hand saw injuries. Support the offcut end as you near the finish of a cut, since unsupported waste tends to snap away suddenly and can drag the blade with it. Keep the saw’s teeth clean of pitch buildup, which increases friction and makes the blade more likely to bind and jump the line mid-stroke.
Common Mistakes: Forcing the saw instead of letting the teeth do the work, which causes wandering cuts and blade binding. Starting a cut without a guide notch, causing the blade to skate off the line.
Related Tools: Carpenter square (for marking the cut line), marking tool (for scoring the line before cutting to reduce splintering).
> Common Mistake: Beginners often push down hard on the saw, assuming more pressure means a faster cut. In reality, this bends the blade and causes it to bind — long, even strokes with light pressure cut faster and straighter.
> Pro Tip: Start every cut with a light backward pull to create a shallow starter notch before pushing forward. This gives the teeth a groove to track in, preventing the blade from skating off the marked line on the first stroke.
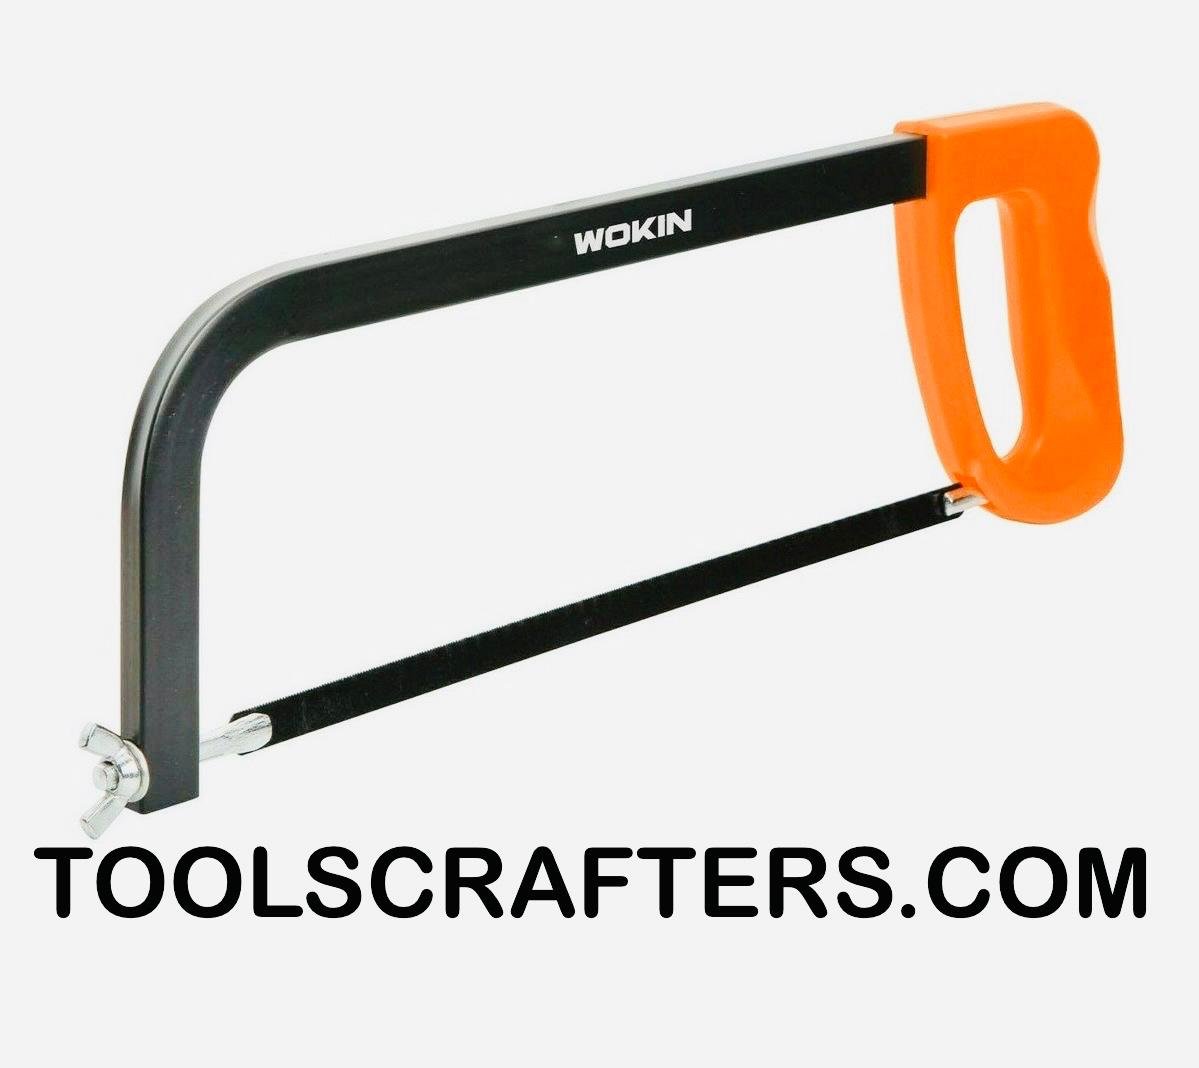
4. Hacksaw
What It Is: A fine-toothed saw with a rigid, tensioned frame, primarily used for cutting metal, though useful on plastics and some dense composites.
Purpose & Working Principle: Unlike a hand saw, the hacksaw’s thin, replaceable blade is held under tension by the frame, which keeps it rigid enough to make accurate straight cuts through hard materials without buckling. The very fine teeth are necessary because metal doesn’t shear as easily as wood.
Types & Variations: Standard fixed-frame hacksaws, adjustable-frame hacksaws (accept multiple blade lengths), and mini hacksaws for tight spaces. Blades are rated by TPI — 24 TPI is common for general metal cutting, with finer teeth used on thin-walled materials.
Common Uses: Cutting bolts, nails, metal pipe, conduit, and trimming hardware like hinges or brackets to fit.
Buying Considerations: An adjustable-frame hacksaw is more versatile since it accepts standard replacement blades of different lengths. Blade tension matters more than the frame’s price — a loose blade will bow and wander regardless of frame quality.
Maintenance: Replace blades once teeth dull or chip rather than trying to resharpen them (hacksaw blades are inexpensive and not practically field-sharpenable). Keep the frame’s tension mechanism free of rust.
Safety: Blades can snap under excess side pressure, sending fragments flying — always wear eye protection when cutting metal. Secure the workpiece in a vise rather than holding it by hand. Avoid twisting or side-loading the blade mid-cut to free a binding cut, since this is the most common way hacksaw blades snap and throw fragments toward the user’s hands and face.
Common Mistakes: Using a hand saw’s wood-cutting technique (long strokes, low tooth count) on metal, which dulls the blade almost instantly. Installing the blade with teeth facing the wrong direction — hacksaw blades typically cut on the push stroke.
Related Tools: Spanner set (often used together when trimming and fitting metal hardware), cutting nipper (for smaller-gauge wire and fasteners).
> Workshop Note: A hacksaw blade that squeals or chatters instead of cutting cleanly is almost always dull, not just slow — swap it rather than pushing harder, since forcing a dull blade is what leads to snapped blades and slipped cuts.
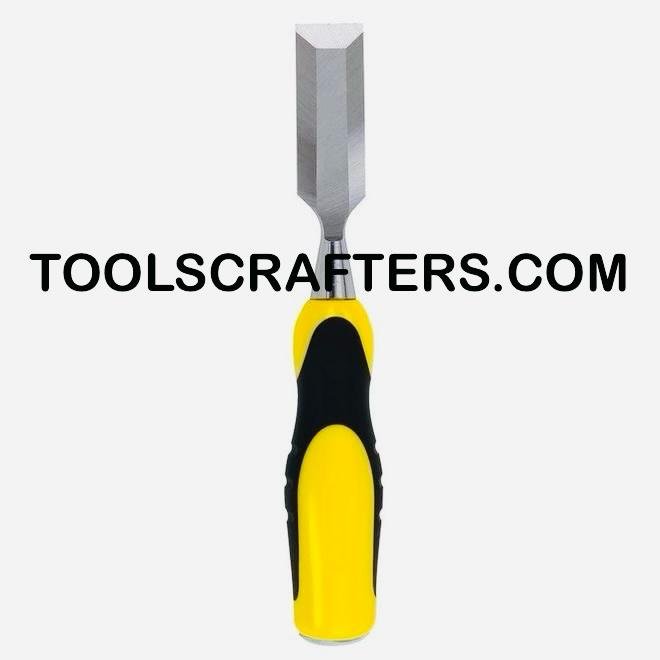
5. Chisels
What It Is: A hand tool with a sharpened flat blade on one end, driven or pushed to pare, carve, or cut away wood.
Purpose & Working Principle: A chisel works purely as a wedge — its beveled edge concentrates force into a thin line of contact, splitting or shearing wood fibers cleanly. Whether it’s tapped with a mallet or pushed by hand, the geometry of the bevel angle determines how cleanly it cuts and how well it holds an edge.
Types & Variations: Bevel-edge chisels (general-purpose, angled sides for getting into corners), mortise chisels (thick, strong blades built for chopping deep, square-sided mortises), and paring chisels (thin, long blades pushed by hand for fine, controlled surface work rather than struck with a mallet).
Common Uses: Cutting mortise-and-tenon joints, cleaning up saw cuts, carving recesses for hinges and hardware, trimming and fitting joinery.
Buying Considerations: Buy a small set (typically 1/4″, 1/2″, 3/4″, and 1″) rather than a single chisel — different joint widths demand different blade widths. Steel quality matters enormously here: a chisel that holds its edge through a full afternoon of chopping is worth more than one that needs constant resharpening.
Maintenance: Chisels require the most regular maintenance of any tool in this list — a dull chisel is both less effective and more dangerous, since it requires more force and is more likely to slip. Hone the edge on a sharpening stone regularly, and always store chisels with edge guards to protect both the blade and your hands.
Safety: Always cut away from your body and keep both hands behind the cutting edge. Never chisel toward a hand holding the workpiece. Clamp small or unstable workpieces to the bench rather than holding them in your palm — a chisel that skips off a curved or narrow piece has nowhere safe to go if your hand is behind it. When paring by hand rather than striking with a mallet, use short, controlled pushes instead of long strokes, since a long push gives a slip more distance to build momentum before it stops.
Common Mistakes: Using a chisel as a pry bar or screwdriver, which chips or bends the edge. Letting the edge go dull and compensating with more force instead of resharpening — this is the single most common cause of chisel slip injuries.
Related Tools: Marking tool (lays out the joint the chisel will cut), hand planer (finishes surfaces the chisel has roughed in).
> Safety Note: More hand injuries in woodworking shops come from dull chisels than sharp ones. A sharp chisel cuts with control at low force; a dull one requires enough force that a slip becomes dangerous.
> Pro Tip: Test chisel sharpness by lightly shaving the edge across a piece of scrap end grain — a sharp chisel slices cleanly with little resistance, while a dull one tears and skips. This tells you more than eyeballing the edge for shine.

6. Cutting Nipper
What It Is: A pliers-style hand tool with sharpened jaws, used to cut, pull, or trim nails, wire, and small fasteners.
Purpose & Working Principle: The nipper uses a lever-and-wedge combination — long handles multiply hand force, while the angled, hardened jaws concentrate that force into a shearing or gripping action at the tip.
Types & Variations End nippers (jaws at a right angle to the handles, ideal for pulling nails flush or below the surface), and diagonal nippers (angled cutting jaws, better suited to trimming wire and thin fasteners flush).
Common Uses: Pulling bent or misplaced nails, trimming protruding nail or staple points, cutting wire ties and light-gauge wire, snipping zip ties and cable on site.
Buying Considerations: Choose nippers with hardened jaw tips specifically rated for nail-cutting — general-purpose pliers will dull quickly if used on hardened nails. Comfortable, non-slip handle grips reduce hand fatigue on repetitive pulling tasks.
Maintenance: Keep the pivot lightly oiled so the jaws open and close smoothly; wipe away resin and rust promptly, since a stiff pivot reduces cutting leverage.
Safety: Cut fragments can fly when nipping wire or nail heads — wear eye protection. Keep fingers clear of the jaw’s closing path.
Common Mistakes: Using nippers on fasteners too large or hardened for the tool, which chips the jaws. Prying with the tips instead of using the intended leverage point, bending the jaws out of alignment.
Related Tools: Hammer (for driving nails the nipper later pulls or trims), spanner set (for larger hardware nippers aren’t designed to handle).
> Workshop Note: When pulling a nail flush or below the surface, rock the nipper’s jaw against a scrap wood block rather than the finished surface — the block acts as a fulcrum and protects the wood from the crescent-shaped dent the jaw would otherwise leave behind.
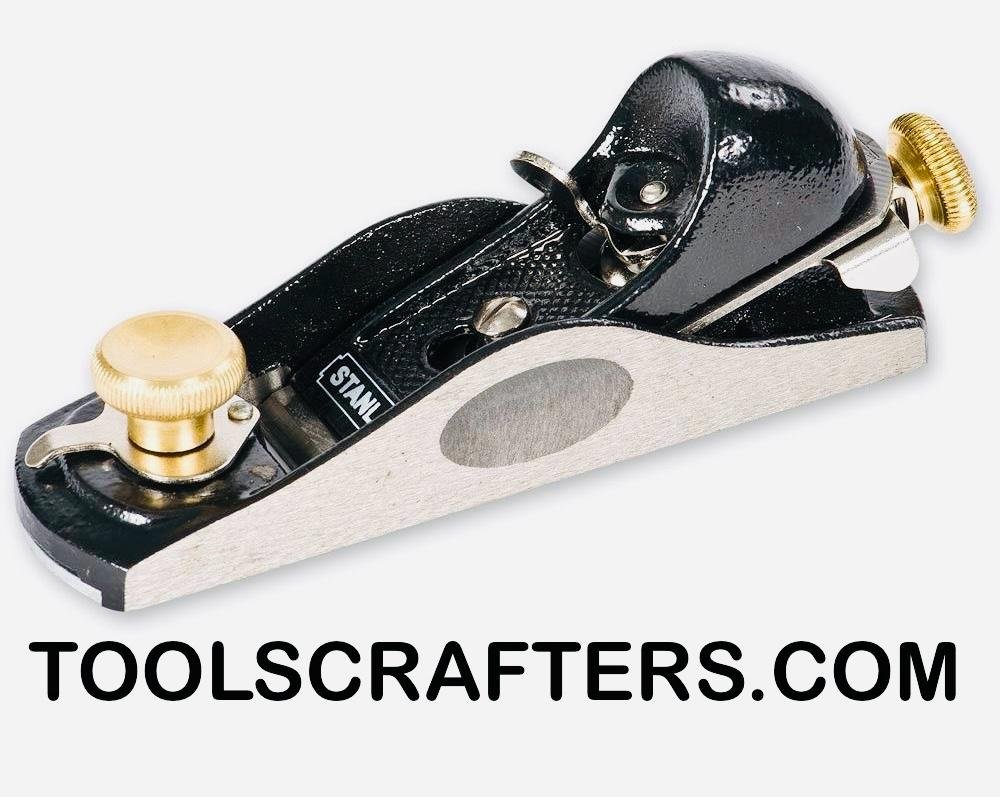
7. Hand Planer
What It Is: A tool with a angled blade set into a flat sole, pushed across a wood surface to shave away thin layers and produce a smooth, flat finish. Often called a block plane in its compact form.
Purpose & Working Principle: The plane’s blade sits at a controlled angle and depth within the sole, exposing only a fraction of a millimeter of cutting edge. As the tool is pushed forward, the blade shears off a thin, uniform shaving, while the flat sole riding along the surface prevents the cut from going deeper than intended — this is what makes a hand plane capable of far finer control than sandpaper.
Types & Variations: Block planes (small, one-handed, ideal for end grain and quick trimming), and standard-size smoothing planes used two-handed for finishing flat surfaces.
Common Uses: Trimming door edges to fit, smoothing rough-sawn boards, chamfering edges, fine-tuning joint fit, removing tool marks before finishing.
Buying Considerations: Blade steel quality and the ability to finely adjust blade depth are the two features worth paying for. A plane with a sole that isn’t flat will never cut evenly, so check for a flat, machined base.
Maintenance: Keep the blade sharp — a dull plane blade tears wood fibers instead of shearing them cleanly, producing a rough surface. Wax the sole occasionally to reduce friction, especially on resinous softwoods.
Safety: The exposed blade edge is sharp even when not in use — store with the blade retracted or guarded. Always plane with the grain direction to avoid tear-out and unexpected blade grabbing.
Common Mistakes: Planing against the grain, which causes tear-out and a rough finish. Taking too deep a cut in one pass instead of several light passes, which strains the tool and produces uneven results.
Related Tools: Big hand planer (for larger surfaces), half round file (for shaping curved or irregular areas a plane can’t reach), chisels (for corners a plane’s sole can’t access).
> Pro Tip: Waxing the sole of a hand plane with a block of paraffin wax reduces friction dramatically, especially when working softwoods that tend to gum up the blade and sole.
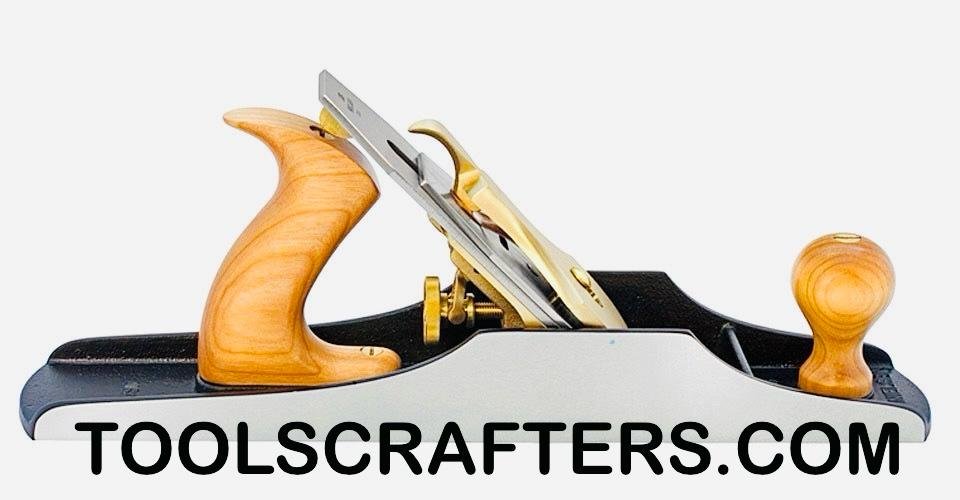
8. Big Hand Planer
What It Is: A larger version of the hand plane — typically a jack plane or jointer plane — used two-handed to flatten and true long boards.
Purpose & Working Principle: The working principle is identical to a block plane, but the extended sole length is the key functional difference: a longer sole rides over high spots and low spots simultaneously, meaning the blade only cuts the highest points on a board until the entire surface is level. This is what allows a jointer plane to flatten a warped board in a way a shorter plane cannot.
Types & Variations: Jack planes (mid-length, general-purpose flattening and initial dimensioning), and jointer planes (longest sole, used for final flattening and for truing edges before glue-ups).
Common Uses: Flattening rough-sawn or warped boards, truing edges before joining two boards edge-to-edge, dimensioning stock by hand when no power jointer is available.
Buying Considerations: Weight and sole length matter here — a longer, heavier plane is more work to push but delivers a flatter result over long boards. Beginners often do better starting with a well-tuned jack plane before investing in a full jointer plane.
Maintenance: Same principles as the block plane — sharp blade, flat sole, light waxing — but check sole flatness more often, since any warp in a long sole directly undermines the tool’s core purpose.
Safety: Heavier than a block plane, so maintain a stable stance and secure the workpiece firmly before pushing long, controlled strokes.
Common Mistakes: Trying to flatten a badly warped or twisted board without first checking it with winding sticks or a straightedge, leading to removing far more material than necessary in the wrong places.
Related Tools: Hand planer/block plane (for finishing work the big planer sets up), spirit level (for checking flatness after planing), carpenter square (for checking edges are square after jointing).
> Workshop Note: Many carpenters check a board’s flatness with winding sticks — two straight, matched strips laid across the board at each end — before ever picking up the planer. Sighting across the tops of the sticks reveals twist that’s hard to spot by eye on the board alone.
9. Hammer
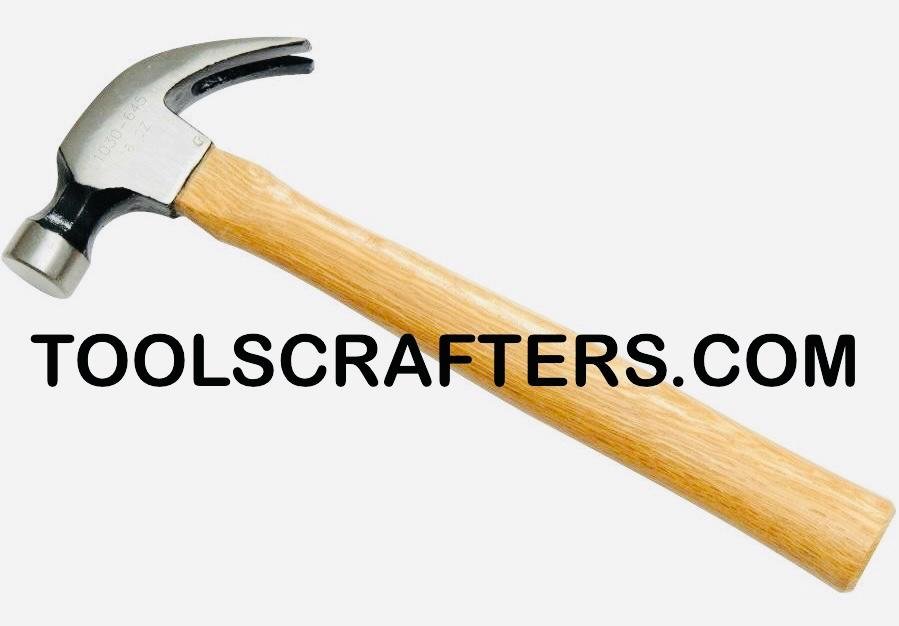
What It Is: A striking tool with a weighted head and a handle, used to drive or remove nails and to strike other tools such as chisels.
Purpose & Working Principle: A hammer converts arm motion into concentrated kinetic energy delivered at the head. Physics does most of the work here — a heavier head or a faster swing delivers more force, which is why hammer weight is chosen based on the task rather than arbitrarily.
Types & Variations: Claw hammers (curved claw for pulling nails, ideal for general carpentry and trim work), and framing hammers (heavier head, straighter claw, longer handle, built for driving large framing nails quickly).
Common Uses: Driving and pulling nails, light demolition, striking chisels and other struck tools, assembling and disassembling joints.
Buying Considerations: Handle material affects feel and shock absorption — wood (traditionally hickory) offers good vibration dampening and a repairable/replaceable handle, fiberglass offers durability and weather resistance, and steel offers maximum durability but transmits the most shock to the hand. Head weight should match the work: 16 oz for general/finish work, 20–28 oz for framing.
Maintenance: Check the head periodically for looseness on the handle — a loose head is a serious safety hazard. Keep the striking face clean of dirt and rust for reliable, non-glancing nail strikes.
Safety: Always wear eye protection when striking metal fasteners or chisels — chips can fly from both the nail head and the hammer face. Never use a hammer with a cracked handle or a loose head. Strike squarely with the center of the face rather than the edge — glancing, off-center blows are the most common cause of a hammer skipping off a nail head and striking a hand or finger instead. Keep the striking face free of oil or grease, which reduces grip on the nail head and increases the chance of a glancing hit.
Common Mistakes: Choking up too high or too low on the handle for the task at hand, reducing accuracy. Using a finish hammer for heavy framing work, which is both inefficient and hard on the tool.
Related Tools: Cutting nipper (for pulling nails a hammer’s claw can’t reach), screwdrivers (often used alongside a hammer when hardware requires both nails and screws).
> Safety Note: Always inspect the hammer head-to-handle connection before use. A head that flies off mid-swing is one of the most serious hand-tool injuries a workshop can produce.
10. Screwdrivers
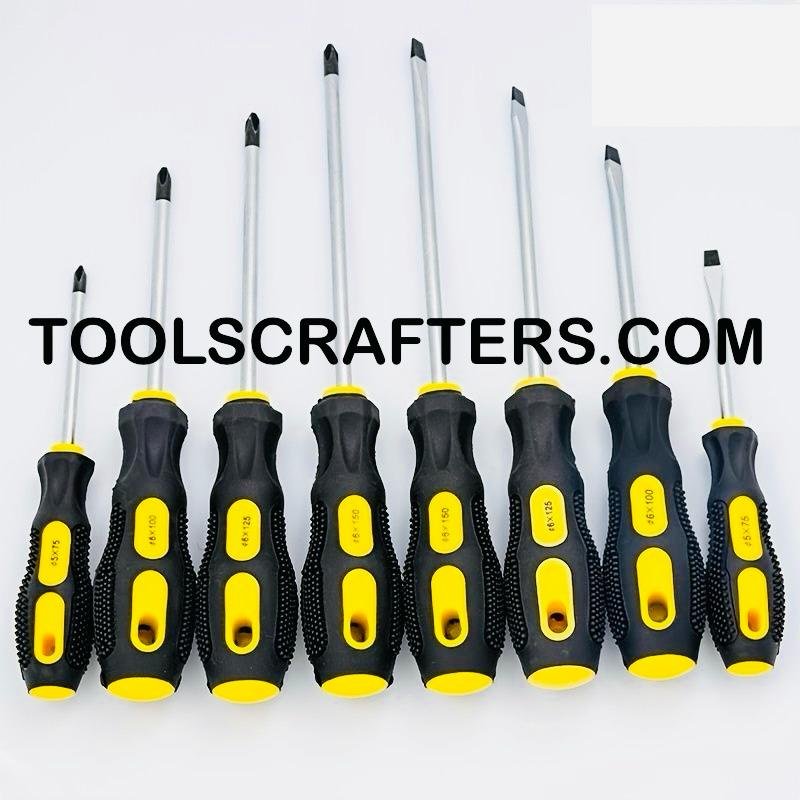
What It Is: A hand tool with a shaped tip used to turn screws, driving them into or out of material via rotational force.
Purpose & Working Principle: A screwdriver applies torque — rotational force — through a shaft to a screw head shaped to match the driver’s tip. The screw’s threads then convert that rotation into linear driving force, pulling the screw into the material.
Types & Variations: Flathead (slotted) drivers for older or simple hardware, Phillips drivers (cross-shaped, self-centering, the most common modern type), and Pozidriv drivers (similar to Phillips but with additional contact points for better torque transfer and less cam-out). Sizes are matched to screw head sizes — using the wrong size is one of the most common causes of stripped screws.
Common Uses: Assembling furniture and cabinetry, installing hardware and hinges, general repair and disassembly work.
Buying Considerations: A quality set covers multiple flathead and Phillips sizes at minimum; magnetic tips are worth the small premium since they hold screws in place for one-handed starts, especially overhead or in tight spaces.
Maintenance: Keep tips clean and free of burrs — a worn or rounded tip will slip and strip screw heads more easily. Replace or resharpen a chipped flathead tip rather than continuing to force it.
Safety: A slipping screwdriver is a common source of hand punctures — always keep your off-hand clear of the driving path, especially when starting a screw.
Common Mistakes: Using an undersized or mismatched tip, which strips the screw head. Pressing down without enough force while turning, causing the tip to cam out of the slot.
Related Tools: Hammer (for starting some screws or for combined nail-and-screw assembly), spanner set (for hardware using bolts rather than screws).
> Workshop Note: A worn Phillips tip often still looks fine at a glance but rounds over at the very corners where it grips the screw. If a driver starts cam-ing out of screws it used to handle easily, check the tip against a new one of the same size before blaming the screws.
11. Spirit Level
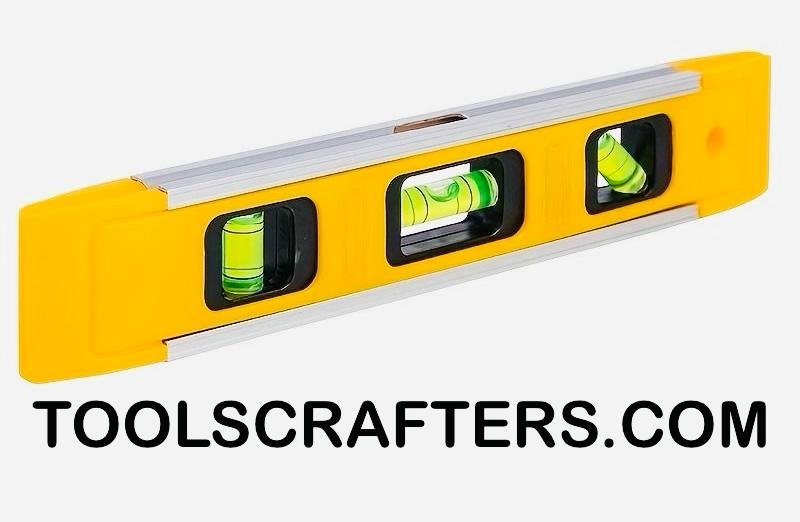
What It Is: A tool used to determine whether a surface is perfectly horizontal (level) or vertical (plumb), using a liquid-filled vial with an air bubble.
Purpose & Working Principle: The vial is slightly curved and filled with a liquid (traditionally alcohol-based spirit, hence the name) that leaves a small air bubble. Gravity pulls the liquid to the lowest point of the curve; when the bubble sits precisely between two marked lines, the surface the level is resting on is exactly horizontal or vertical.
Types & Variations: Box levels (longer, rectangular body for checking long surfaces like walls or beams), and torpedo levels (short, compact, useful in tight spaces and for smaller work like shelving or pipe runs).
Common Uses: Checking that shelves, cabinets, and countertops sit level, verifying that framing members are plumb before fastening, setting consistent reference lines across a project.
Buying Considerations: Longer levels give more accurate readings over long spans, since small errors are magnified less across greater length. Check vial accuracy at purchase if possible — some low-cost levels ship slightly miscalibrated.
Maintenance: Avoid dropping the tool, which can crack or shift the vials out of true. Store it flat rather than leaning, to avoid warping over time.
Safety: Minimal direct hazard, but an inaccurate level leads to structural or aesthetic errors that can compound into real safety issues (an out-of-level ledger board, for instance).
Common Mistakes: Trusting a level without periodically checking its own accuracy by flipping it end-for-end on the same surface and comparing readings. Reading the bubble from an angle rather than straight-on, which introduces parallax error.
Related Tools: Carpenter square (for checking perpendicularity in addition to level), measuring tape (for establishing consistent reference heights).
> Workshop Insight: To test any level’s accuracy, place it on a surface and note the bubble position, then flip the level end-for-end on the same spot. If the bubble reads differently, the level is out of calibration.
12. Basula (Adze)
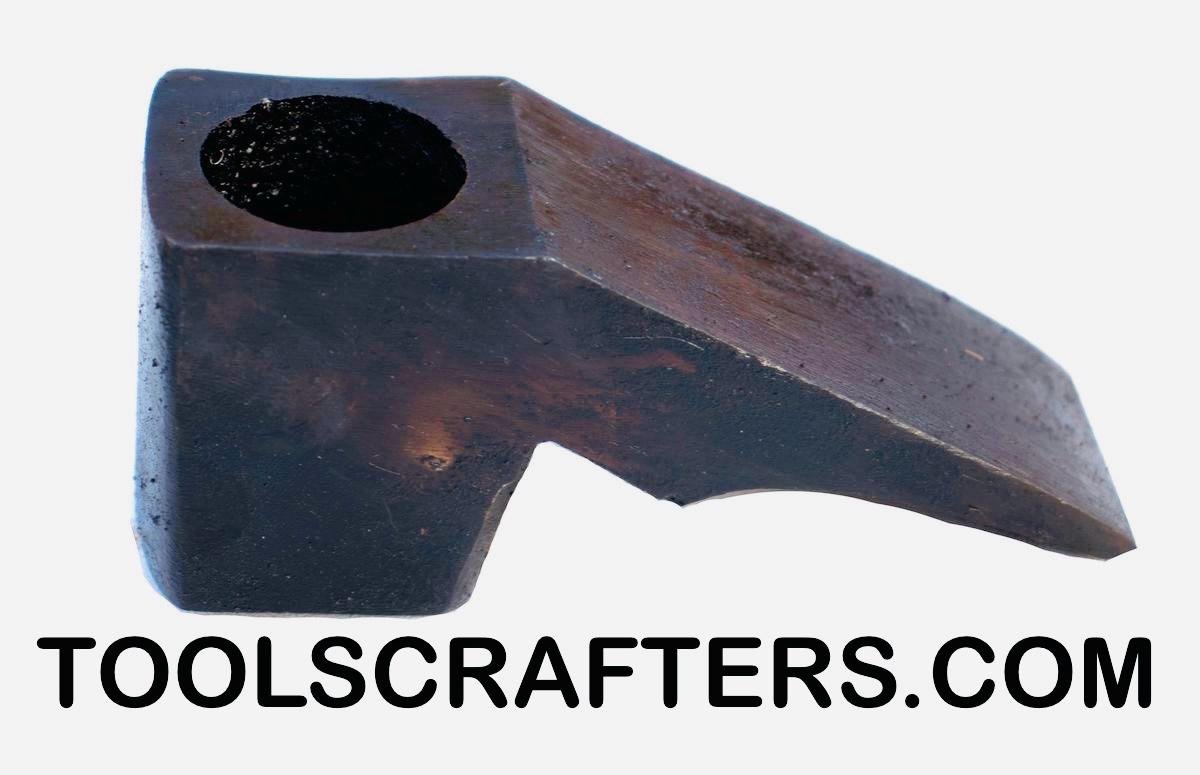
What It Is: A traditional hand tool with a curved, arched blade set perpendicular to the handle, used to hew and shape rough timber — one of the oldest woodworking tools in existence, still used in traditional and timber-frame carpentry today.
Purpose & Working Principle: Unlike a plane or chisel that cuts along the tool’s line of travel, the basula is swung downward and toward the user, with the curved blade slicing across the wood surface in a controlled arc. This makes it uniquely effective at removing large amounts of material quickly from rough, unmilled logs and beams — something no plane or saw is designed to do efficiently.
Types & Variations: Regional and traditional variations exist across different carpentry cultures, generally differing in handle length, blade curvature, and whether the tool is designed for one-handed or two-handed use. Larger, long-handled versions are used for heavy timber hewing; smaller versions allow finer shaping control.
Common Uses: Hewing rough logs into flat-sided beams, shaping timber-frame structural members, traditional boat-building and rustic furniture work, rough-shaping before finer tools like planes take over.
Buying Considerations: Blade steel quality and edge retention matter enormously given the tool’s heavy use. Handle length should match the user’s height and the scale of work — a handle too short forces awkward, less controlled swings.
Maintenance: This is a tool that requires disciplined sharpening, since a dull basula is both ineffective and genuinely dangerous — more force is needed to remove the same amount of material, increasing the chance of a mis-swing. Store with a blade guard given the size and exposure of the cutting edge.
Safety: This is the highest-risk tool in this guide. The basula is swung with real force toward the user’s own feet and legs; proper stance, a clear swing radius, and full attention are non-negotiable. Never use it without appropriate footwear and never with anyone standing within the swing arc. Position the timber so your feet are set well back and to the side of the cutting line rather than directly behind it, and take shorter, more controlled strokes when working near the end of a log where less material resists the blade’s travel. Fatigue is a real factor with this tool — stop and rest before your grip or swing accuracy starts to degrade, since a tired swing is a mis-aimed swing.
Common Mistakes: Standing with feet positioned within the swing’s landing zone. Attempting fine shaping work with a large basula better suited to rough hewing — using the wrong tool scale for the task increases both poor results and risk.
Related Tools: Big hand planer (for finishing surfaces after basula hewing), chisels (for detail work the basula can’t perform).
> Safety Note: Because the basula is swung toward the user’s body, it demands more deliberate safety awareness than any other tool in this list. Always maintain clear space around your swing arc and never rush the motion.
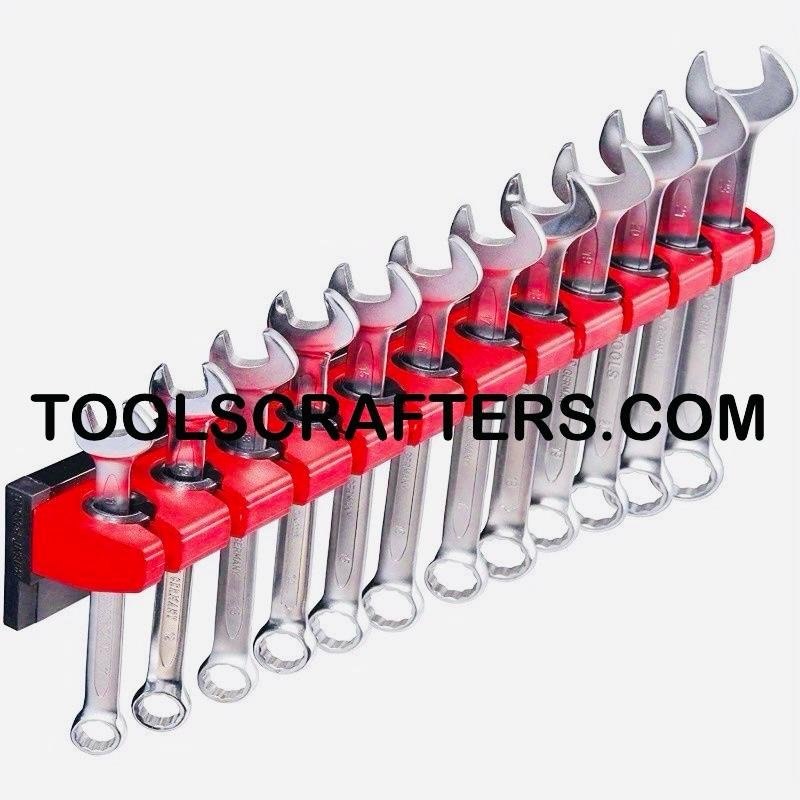
13. Spanner Set
What It Is: A set of wrenches used to tighten or loosen nuts and bolts, sized to match standard hardware dimensions.
Purpose & Working Principle: A spanner applies torque to a bolt or nut’s flat sides through leverage — the longer the handle relative to the jaw, the more mechanical advantage is generated, allowing significant force to be applied with moderate hand effort.
Types & Variations: Open-end spanners (two-sided open jaws, quick to place but with less contact surface), box-end (ring) spanners (fully enclosed around the nut, more secure grip, less likely to slip), and combination spanners (open on one end, boxed on the other — the most practical general-purpose choice). Sets typically come in metric or SAE (imperial) sizing, and increasingly in dual sets for mixed hardware.
Common Uses: Assembling bolted furniture and structural hardware, tightening machine bolts on tools and equipment, adjusting or removing hardware like door hinges and brackets that use nuts and bolts rather than screws.
Buying Considerations: A combination set covering the common range of sizes for your region’s hardware standards is the most practical purchase. Forged steel construction resists bending under load better than cast alternatives.
Maintenance: Wipe clean of grease and grit after use; a spanner with grime in the jaw won’t seat fully on the bolt, increasing slip risk.
Safety: A poorly seated spanner can slip suddenly under load — always ensure full jaw contact before applying force, and pull rather than push where possible to control a sudden slip.
Common Mistakes: Using an ill-fitting spanner size that rounds off the bolt head. Applying force with a cheater bar or pipe extension beyond the tool’s rated capacity, risking sudden failure.
Related Tools: Screwdrivers (for hardware using screws rather than bolts), hacksaw (for trimming bolts or metal hardware to length).
> Workshop Note: When a bolt is seized or over-torqued, resist the urge to reach for a larger spanner and more force before trying penetrating oil and a few minutes of wait time. Most “stuck” bolts are corrosion problems, not torque problems, and brute force on a corroded fastener is what rounds off heads.
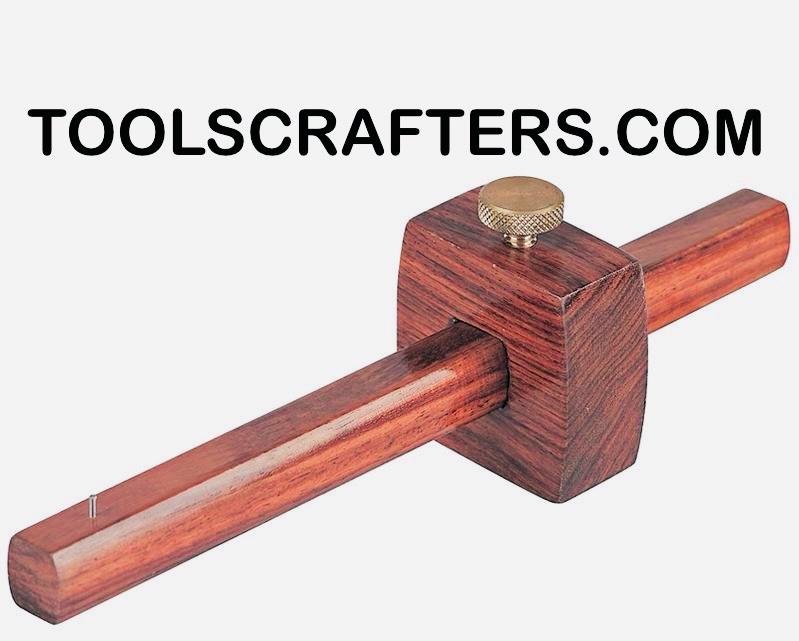
14. Marking Tool
What It Is: A general term covering the tools carpenters use to transfer precise measurements onto wood as visible lines — most commonly a marking gauge, marking knife, or carpenter’s pencil.
Purpose & Working Principle: Accurate joinery depends on a line that’s both visible and precise. A marking gauge uses a fixed pin or blade set at a specific distance from a fence, dragged along an edge to scribe a perfectly parallel line. A marking knife severs the surface wood fibers cleanly, creating a fine groove that guides a chisel or saw far more precisely than a pencil line ever could, because it actually breaks the fibers rather than just coloring the surface.
Types & Variations: Marking gauges (for parallel lines relative to an edge, essential for consistent mortise and tenon layout), marking knives (for crisp, fiber-severing lines across joints), and traditional carpenter’s pencils (flat, hard-to-lose, quick for rough layout where extreme precision isn’t required).
Common Uses: Laying out joinery (mortises, tenons, dovetails), scoring cut lines to reduce tear-out before sawing, transferring measurements from one piece to a mating piece.
Buying Considerations: For fine joinery, a marking knife and gauge outperform a pencil significantly in precision — the visible width of a pencil line alone can introduce enough error to loosen a tight-fitting joint. For rough carpentry and framing, a durable carpenter’s pencil remains the practical choice.
Maintenance: Keep marking knife edges honed the same way you would a chisel; a dull marking knife tears fibers instead of severing them cleanly. Keep gauge pins sharp and the fence mechanism free of grit so it locks securely at the set distance.
Safety: Marking knives carry blade-related risk similar to a small chisel — keep fingers behind the cutting path.
Common Mistakes: Relying on a pencil line for fine joinery where a knife line is needed for accuracy. Failing to reset a marking gauge’s distance correctly, causing mismatched joint layouts between mating pieces.
Related Tools: Carpenter square (guides straight marking lines), chisels (follow the marked/scored line during joint cutting).
> Workshop Note: For joints that will be cut with a chisel, mark with a knife rather than a pencil even if it feels like an extra step. The scored line gives the chisel’s edge a physical groove to register in, which noticeably reduces the chance of the tool wandering off the line under hand pressure.
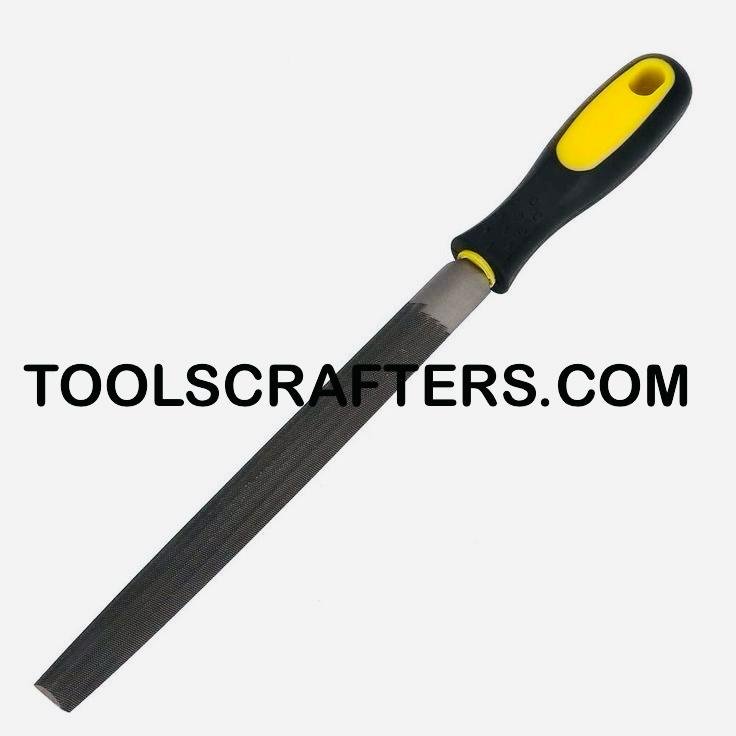
15. Half Round File
What It Is: A hand file with one flat side and one curved (convex) side, used to shape, smooth, and deburr wood and metal edges.
Purpose & Working Principle: A file’s surface is covered in rows of small, angled teeth that shave away material with each stroke, similar in principle to a saw but on a much finer, more controlled scale. The half round shape gives the user two working surfaces in one tool: the flat side for straight or convex surfaces, and the curved side for concave curves and rounded openings that a flat file cannot reach.
Types & Variations: Files are classified by “cut” — coarse cut for fast material removal, and fine (smooth) cut for final finishing passes. Sizes range from small needle files for delicate work to larger files for general shaping.
Common Uses: Rounding sharp edges and corners, smoothing saw-cut edges, deburring metal hardware and fasteners, shaping curved cutouts and openings in wood.
Buying Considerations: A half round file in a medium cut is the most versatile single purchase, handling both moderate material removal and reasonably fine finishing. A comfortable, securely attached handle is worth checking, since files are pushed with real force.
Maintenance: Clean the teeth regularly with a file card (a specialized wire brush) to clear out embedded material — a clogged file stops cutting effectively and can slip. Store files separately from other tools so the teeth don’t dull against harder metal surfaces.
Safety: Always use a handle — filing without one risks the tang (the pointed end that fits into the handle) puncturing your palm if the file catches. Push forward on the cutting stroke and lift slightly on the return to avoid dulling the teeth prematurely.
Common Mistakes: Using a file without a handle attached. Applying the file with a sawing back-and-forth motion rather than a controlled push stroke, which wears teeth unevenly and reduces cutting efficiency.
Related Tools: Hand planer (handles flat surfaces a file would be too slow for), chisels (rough in a shape the file then refines).
> Workshop Note: Rub a small piece of chalk across a file’s teeth before working softer woods or aluminum. The chalk fills the gaps between teeth and reduces clogging, keeping the file cutting cleanly for longer between cleanings.
How to Choose Quality Carpenter Tools
Materials That Matter
Blade and edge tools are only as good as their steel. Chrome vanadium steel is a common standard for quality hand tools because it balances hardness (edge retention) with enough toughness to resist chipping under normal use. Cheaper tools often use plain carbon steel with less consistent heat-treating, which dulls faster and is more prone to chipping. Handles matter almost as much as blades: hickory remains a benchmark for shock absorption in striking tools, while fiberglass and composite handles offer better weather and moisture resistance.
Signs of a Well-Made Tool
Look for even, consistent grinding on cutting edges (uneven grinds indicate rushed manufacturing), tight tolerances on moving parts like adjustable squares and gauge fences, and handles that are securely fastened with no wobble. A well-made tool also tends to have a specific, purposeful weight — neither so light it feels flimsy nor so heavy it fights the user unnecessarily.
Budget vs Professional-Grade: What’s Worth the Upgrade
Not every tool benefits equally from a bigger budget. Measuring tapes, squares, and screwdrivers have a lower ceiling — a mid-range option from a reputable brand performs nearly as well as a premium one, since the core mechanism is simple. Chisels, hand planes, and saws, by contrast, show a much bigger real-world difference between budget and premium — steel quality, factory grinding accuracy, and how well the tool holds an edge directly affect the quality of your work and how often you’re stopping to resharpen.
> Workshop Note: A quick way to judge steel quality before buying is to run a fingernail lightly across the cutting edge under good light. A consistently ground edge reflects light in one even line; an unevenly ground or poorly finished edge shows visible gaps, nicks, or waviness even before the tool has been used.
Quick Reference: Tool Job, Accuracy, and Best Use
| Tool | Primary Job | Accuracy | Speed | Best Use |
|—|—|—|—|—|
| Measuring Tape | Establish dimensions | High | Fast | Any length measurement |
| Carpenter Square | Verify/mark 90° angles | High | Fast | Squaring cuts and joints |
| Hand Saw | Cut wood to size | Medium | Medium | Rough and finish crosscuts/rips |
| Hacksaw | Cut metal fasteners/pipe | Medium | Slow | Trimming bolts, pipe, hardware |
| Chisels | Pare/chop joints | Very High | Slow | Mortises, tenons, fine joinery |
| Cutting Nipper | Pull/trim nails and wire | Medium | Fast | Nail removal, wire trimming |
| Hand Planer | Smooth/trim surfaces | High | Medium | Edge trimming, fine smoothing |
| Big Hand Planer | Flatten/true long boards | High | Slow | Dimensioning rough stock |
| Hammer | Drive/pull fasteners | Medium | Fast | Nailing, striking chisels |
| Screwdrivers | Drive/remove screws | Medium | Medium | Hardware and assembly |
| Spirit Level | Confirm level/plumb | High | Fast | Shelves, framing, cabinetry |
| Basula | Hew rough timber | Low–Medium | Fast | Rough shaping of logs/beams |
| Spanner Set | Tighten/loosen bolts | High | Medium | Bolted hardware and fittings |
| Marking Tool | Transfer precise lines | Very High | Fast | Joinery layout, cut lines |
| Half Round File | Shape/smooth edges | Medium | Slow | Deburring, edge easing |
Tool Pairing — Which Tools Work Best Together
Most real carpentry tasks require a sequence of tools working together, not a single tool in isolation. The pairings below aren’t arbitrary groupings — they follow the order tools are actually picked up on a real workbench, and each handoff exists because the previous tool has reached the limit of what it can do accurately.
The Core Cutting Workflow
“`
Tape Measure → Square → Marking Tool → Hand Saw → Plane → Chisel
“`
This is the sequence behind nearly every cut-and-fit task in carpentry, and the order matters more than any individual step:
– Tape Measure → Square: The tape gives you a number; the square gives that number a true angle to be marked at. Marking directly from the tape without squaring the line first is how slightly-crooked cuts happen even when the length is correct.
– Square → Marking Tool: The square defines where the line goes; the marking tool is what actually puts a precise, followable line on the wood. A square without a sharp, accurate marking tool still leaves you guessing exactly where to cut.
– Marking Tool → Hand Saw: The saw follows the marked line, cutting to its waste side rather than trying to hit the final dimension directly — this is why the marked line needs to be precise, since the saw is only as accurate as the line it’s tracking.
– Hand Saw → Plane: The saw gets you close; the plane gets you exact. A saw cut is rarely perfectly smooth or perfectly square, and the plane’s flat sole is what corrects both in the same pass.
– Plane → Chisel: Once a surface or edge is flat and true, the chisel handles the details a plane’s flat sole physically cannot reach — inside corners, joint walls, and recesses.
Skipping a step in this chain doesn’t just risk a worse-looking result; it usually means the *next* tool in the sequence has to compensate for an error it wasn’t designed to fix, which is where most avoidable mistakes in a workshop actually come from.
Measuring + Marking Combos
Measuring tape establishes the dimension; the carpenter square establishes the angle; the marking tool transfers both into a precise, visible line. This three-tool sequence underlies almost every cut made in a workshop.
Cutting + Finishing Combos
A hand saw or chisel removes the bulk of the material; a hand planer or half round file then refines the surface or edge to its final, smooth dimension. Rough work and finish work are almost always split across two different tool types for this reason.
Assembly Combos
“`
Hammer → Screwdriver → Spanner Set → Spirit Level
“`
A hammer drives fasteners; a screwdriver handles threaded hardware; a spanner set tightens bolted connections. Most assembly stages call on at least two of these three, depending on the hardware specified for the joint. The spirit level closes the sequence deliberately — it’s checked before final tightening, while there’s still room to adjust, and again after, to confirm the assembly held its position under load.
Carpenter Tool Maintenance Guide
Cleaning and Rust Prevention
Wood dust holds moisture, and moisture on unprotected steel causes rust — the single biggest threat to hand tool longevity. Wipe down blades and metal surfaces after each use, and consider a light coat of tool oil on cutting tools that won’t be used again immediately.
Sharpening Blades and Edges
Chisels, plane blades, marking knives, and the basula all require a sharp edge to function safely and effectively. A basic sharpening routine — using progressively finer sharpening stones and finishing with a light stropping pass — should be a regular habit, not an occasional emergency fix when a tool stops cutting.
> Pro Tip: Sharpen for short sessions often rather than long sessions rarely. A chisel or plane blade touched up for two minutes at the start of a project stays in the sweet spot of “easy to resharpen”; one left until it’s visibly dull takes much longer to bring back and removes more steel in the process.
Storage Best Practices
Store edge tools with blade guards or in a way that prevents the cutting edge from contacting other metal tools, which causes chipping. Keep tools dry, and where possible, store them in a way that keeps moving parts (like a combination square’s slide) free of dust buildup.
Tool Lifespan Expectations
A well-maintained, quality hand tool can realistically last decades — many carpenters use chisels and planes inherited from a previous generation. The determining factor isn’t age; it’s whether the tool was kept sharp, dry, and free of abuse like being used as an improvised pry bar.
Maintenance Schedule at a Glance
| Tool | Cleaning Frequency | Sharpening/Adjustment | Rust Check |
|—|—|—|—|
| Measuring Tape | After each use | N/A (replace if hook is loose) | Occasional |
| Carpenter Square | After each use | Verify accuracy monthly | Occasional |
| Hand Saw | After each use | Professional sharpen as needed | Every use in humid shops |
| Hacksaw | After each use | Replace blade when dull | Frame checked monthly |
| Chisels | After each use | Hone before every project | Every use |
| Cutting Nipper | After each use | Oil pivot monthly | Occasional |
| Hand Planer | After each use | Hone blade before each project | Every use |
| Big Hand Planer | After each use | Check sole flatness quarterly | Every use |
| Hammer | Occasional wipe-down | Check head tightness monthly | Rare |
| Screwdrivers | Occasional wipe-down | Inspect tips before use | Rare |
| Spirit Level | After each use | Calibration check quarterly | Rare |
| Basula | After each use | Sharpen before every session | Every use |
| Spanner Set | After each use | N/A | Occasional |
| Marking Tool | After each use | Hone knife/gauge pin regularly | Occasional |
| Half Round File | After each use | Clean with file card each use | Rare |
Storage Guide
| Tool Group | Recommended Storage | Why |
|—|—|—|
| Edge tools (chisels, plane blades, marking knife, basula) | Blade guards, separated from other steel | Prevents chipping from metal-on-metal contact |
| Measuring/marking (tape, square, level, marking gauge) | Flat, padded storage; avoid tossing in bags | Protects calibration and true edges |
| Striking tools (hammer) | Hung or slotted, head supported | Prevents handle stress and head loosening |
| Threaded/bolted hardware tools (screwdrivers, spanner set) | Organized by size in a tray or rack | Speeds selection, reduces size-mismatch mistakes |
| Files | Separate compartment, not touching other tools | Preserves tooth sharpness |
Workshop Safety with Hand Tools
Essential Protective Gear
At minimum, safety glasses (especially for striking, cutting, and metalwork tasks) and appropriate footwear (particularly when using the basula or hammer) should be considered standard, not optional. Gloves are situational — they help with grip and blister prevention but can reduce tactile feedback on precision tools like chisels, so many experienced carpenters skip gloves for fine joinery work specifically.
Safe Handling Practices Per Tool Category
Cutting tools (saws, chisels, cutting nippers) should always be directed away from the body and off-hand. Striking tools (hammer, basula) require a clear swing radius and secure footing. Measuring and marking tools carry low direct risk but should still be stored to avoid edge damage that later compromises accuracy.
First Aid Basics for Common Injuries
Minor cuts from edge tools should be cleaned and covered promptly; any deep cut, especially involving a chisel or the basula, warrants professional medical attention rather than a workshop bandage. Keep a basic first aid kit accessible in any space where edge tools are used regularly.
Safety Equipment by Tool
| Tool | Primary Hazard | Recommended PPE |
|—|—|—|
| Hand Saw / Hacksaw | Cuts, flying fragments (hacksaw) | Eye protection; secure workpiece |
| Chisels | Cuts, slips under force | Cut-resistant gloves optional; clamped workpiece |
| Basula | Severe cuts to legs/feet | Sturdy footwear; clear swing radius; no gloves that reduce grip |
| Hammer | Impact injury, flying chips | Eye protection when striking metal |
| Cutting Nipper | Flying fragments | Eye protection |
| Half Round File | Puncture from tang | Handle always attached |
| Screwdrivers | Puncture from slips | Off-hand clear of driving path |
| Spanner Set | Slips under load, pinched fingers | Full jaw seating before force applied |
Measuring Accuracy — The Foundation of Good Carpentry
Why “Measure Twice, Cut Once” Still Matters
Wood is an unforgiving material in one specific way: you can always cut more off, but you can never add material back. Every measurement error compounds through the rest of a project — a slightly-off first cut leads to a slightly-off joint, which leads to a slightly-off assembly. Rechecking a measurement before cutting costs seconds; correcting a bad cut can cost an entire piece of stock.
Common Measuring Errors and Fixes
Reading the wrong scale on a dual-marked tape, forgetting to account for blade kerf (the width of material the saw itself removes) when planning multiple cuts from one board, and measuring from an unsquared or damaged reference edge are among the most common sources of error. The fix in each case is the same: establish one clear reference point, use consistent tools, and verify before committing to a cut.
Beginner Mistakes to Avoid
Buying a large, unfocused tool set before understanding which tools you’ll actually use regularly. Skipping tool maintenance until a tool stops working rather than maintaining it proactively. Using the wrong tool for a task because it’s the one already in hand (a screwdriver as a pry bar, a chisel as a scraper). Neglecting to check squares and levels for accuracy periodically, trusting factory calibration indefinitely. Rushing measurement and marking steps because cutting feels like the “real” work.
Carpenter Tools vs Power Tools: When to Use Which
Reach for hand tools when precision matters more than speed, when the work is a one-off or small-scale task, when power isn’t available on site, or when the material or joint requires tactile feedback a power tool can’t provide. Reach for power tools when repeating the same cut many times, working with large volumes of material, or when raw material removal speed matters more than fine control. Most experienced carpenters use both fluidly within the same project — power tools to rough in dimensions quickly, hand tools to fit and finish precisely.
Sustainability and Caring for Wooden-Handled Tools
Wooden tool handles — still common on hammers, files, and chisels — benefit from occasional conditioning with boiled linseed oil, which helps prevent the wood from drying out and cracking, particularly in low-humidity environments. A cracked handle should be replaced rather than ignored, since it’s a genuine safety hazard on striking tools. Choosing quality tools built to be maintained and repaired rather than replaced is, in itself, a more sustainable approach than cycling through disposable-grade tools every few years.
Frequently Asked Questions
The 10 Most Important Questions, Answered
1. What are the basic tools every carpenter needs?
At minimum: a measuring tape, a carpenter square, a hammer, a set of screwdrivers, and a hand saw. These five cover measuring, marking, cutting, and basic assembly — the four actions behind most beginner projects. Everything else in a toolkit builds on this base as projects demand more precision or handle different materials, like metal fasteners or fine joinery.
2. What is the most important tool for a carpenter?
There’s no single answer, but the measuring tape has the strongest claim, because every other tool depends on the accuracy of the number it provides. A dull chisel or a rough saw cut can be fixed with more work; a wrong measurement propagates through the entire project and often can’t be corrected without wasting material.
3. What tools do I need to start woodworking as a beginner?
The starter toolkit outlined in this guide — tape, square, hammer, screwdrivers, and a hand saw — is enough to complete real, useful projects like shelving and small repairs. Resist the urge to buy specialty tools like a basula or a full spanner set before a specific project actually requires them.
4. What is the difference between a carpenter square and a try square?
A try square is a small, fixed 90-degree tool used for fine, detailed work, while a carpenter (framing) square is a larger, flat L-shaped tool used for layout tasks like roof framing calculations. A combination square, the most versatile option for most beginners, adjusts to do the job of both plus a depth gauge.
5. What’s the difference between a hand saw and a hacksaw?
A hand saw is built with wider-set teeth for cutting wood, while a hacksaw uses a thin, tensioned, fine-toothed blade designed for cutting metal, such as bolts, nails, and pipe. Using a hand saw’s technique on metal, or a hacksaw’s technique on wood, dulls the blade quickly and produces a poor cut in either direction.
6. Which chisel size should a beginner buy first?
Rather than one chisel, buy a small set covering roughly 1/4″, 1/2″, 3/4″, and 1″ widths. Different joints and details call for different blade widths, and a set covers the range a beginner is likely to need without requiring repeat purchases as projects get more varied.
7. Is a basula (adze) necessary for beginners?
No. The basula is a specialty tool for hewing rough timber and traditional or timber-frame work. Most beginners working on furniture, shelving, or general repairs will never need one early on, and it carries more risk than any other tool in this guide, so it’s worth delaying until a specific project genuinely calls for it.
8. Are hand planes still useful now that power planers exist?
Yes. A power planer is faster for dimensioning large volumes of stock, but a hand plane offers finer control for tasks like trimming a door to fit or smoothing a small surface without risking gouges. Most working carpenters keep both and choose based on the scale and precision of the task.
9. How do I know if my measuring tape or square is accurate?
For a tape, check that the hook moves slightly (this is intentional, not damage) and that readings stay consistent across multiple measurements of the same object. For a square, draw a line against a straightedge, flip the square over, and draw a second line from the same point — if the two lines don’t match, the square is out of true.
10. How often should I sharpen my chisels and plane blades?
Sharpen before starting a new project rather than waiting until the tool feels dull mid-task. Short, frequent honing sessions keep the edge in easy-to-maintain condition and remove far less steel over time than letting the tool go dull and requiring a heavier resharpening later.
Conclusion — Building Skill Through the Right Tools
None of the 15 tools in this guide are complicated on their own. What separates a beginner’s toolbox from a professional’s isn’t the tools themselves — it’s the understanding of why each one is shaped the way it is, when to reach for it, and the discipline to keep it sharp, clean, and accurate. Start with the essentials, learn each tool’s working principle rather than just its name, and let your toolkit grow with the complexity of the projects you take on. That’s how every carpenter, from apprentice to master, has built their skill — one well-understood tool at a time.
About the Author
Md Vajeed is the founder of TOOLSCRAFTERS, a website dedicated to woodworking tools, power tools, furniture hardware, and practical DIY resources.
He researches, tests, and publishes detailed buying guides, tool comparisons, and educational content to help beginners, DIY enthusiasts, and professionals choose the right tools and improve their woodworking skills.
The goal of TOOLSCRAFTERS is to provide accurate, practical, and easy-to-understand information based on product research, real-world applications, and industry best practices.