
Best Angle Grinder Blower Attachment (2026)
Introduction
Walk into almost any small cabinet shop or home workshop and you’ll find the same problem sitting in the corner: a pile of sawdust nobody has time to deal with properly. Most of us already own an angle grinder. Fewer own a dedicated blower, and fewer still have a vacuum convenient enough to drag out for a five-minute cleanup.
That gap is why the angle grinder blower and vacuum attachment has found a steady following among woodworkers and cabinet makers. It’s a simple accessory that mounts onto a standard angle grinder and repurposes the tool’s spinning motor to move air — blowing dust away from a surface, or in some kit designs, pulling debris in like a light vacuum.
This guide covers what the attachment actually does, where it genuinely helps in a woodworking shop, and where it falls short — an honest look rather than a sales pitch.
What Is an Angle Grinder Blower Attachment?
An angle grinder blower attachment, also known as an angle grinder blower and vacuum attachment, is a conversion accessory…
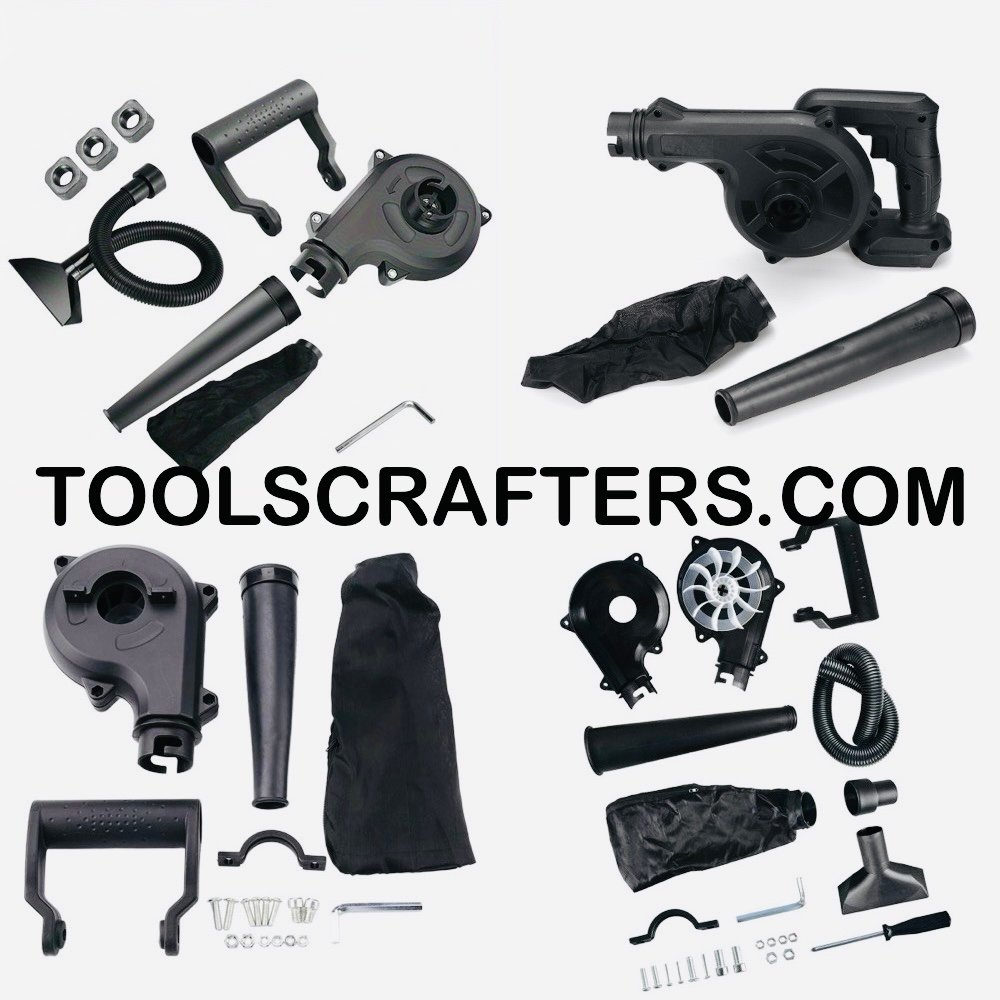
Depending on the specific kit, the attachment may include:
– A fan or impeller unit that threads onto the grinder’s spindle in place of a cutting or grinding disc
– A housing or shroud that redirects airflow through a nozzle
– A hose adapter for kits designed to also work in vacuum mode
– Mounting hardware sized for common angle grinder body diameters
It’s worth being clear about naming here, because these products are marketed under several overlapping terms — angle grinder blower conversion kit, angle grinder blower adapter, and angle grinder vacuum attachment all typically refer to the same category of accessory, sometimes with minor design differences between brands.
This is not a standalone electric blower, not a shop vacuum, not an industrial dust extraction system, and not a leaf blower. It’s a low-cost way to get occasional blower or light vacuum function out of a tool you already own.
How It Works
The mechanics are straightforward. An angle grinder’s motor spins at high RPM to drive a cutting or grinding disc. Swap that disc for a compatible fan or impeller attachment, and the same spinning motion now pushes air instead of cutting material.
Airflow direction and force depend entirely on the design of the attachment and the RPM of the grinder it’s mounted on. A 4.5-inch angle grinder and a larger 7-inch grinder will not produce identical results, and neither will two different attachment designs from different manufacturers. There’s no universal performance figure that applies across the board — this varies by angle grinder model and attachment design, so it’s not something a buyer should expect a single spec sheet to answer.
Blower Mode
In blower mode, the attachment’s fan pushes air outward through a nozzle or open housing. Point that airflow at a dusty surface, and it displaces loose material — sawdust, wood chips, shavings — away from the work area.
This is the mode most woodworkers reach for after finishing a cut. It’s fast, it doesn’t require plugging in a second tool, and it clears the bulk of loose debris off a table saw top, a router table, or a workbench in a matter of seconds.
Vacuum Mode
Some attachment kits are designed to also work in reverse, using a hose fitting to pull air (and with it, light debris) into a collection point rather than pushing it away. This is generally referred to as vacuum mode, though it’s important to set expectations here: it functions as a light-duty suction accessory, not a substitute for a shop vacuum’s motor and filtration system.
Not every kit on the market includes vacuum mode — some are blower-only. If vacuum function matters to you, check the specific product listing rather than assuming every angle grinder attachment does both.
Why Woodworkers Use It
Cabinet makers and furniture builders cut a lot of sheet goods — plywood, MDF, particle board — and every one of those cuts leaves behind a mess. Table saws throw dust into their own cabinets. Circular saws leave a trail along the cut line. Routers pack chips into the base plate and bit area.
The appeal of an angle grinder blower attachment in this setting is simple: it’s already in the shop, it takes seconds to swap onto the grinder, and it clears loose dust and chips without needing a separate blower on the bench.
MDF and particle board in particular tend to produce fine dust that settles into every seam of a cabinet carcass. A quick pass with a blower attachment before assembly or finishing helps remove that dust from joints and interior corners where it would otherwise interfere with glue-up or show up under a finish coat.
Key Features
While exact features vary by manufacturer, most attachments in this category share a similar feature set:
– Direct mount design — fits onto the grinder spindle or body without needing tools beyond what came with the grinder
– Lightweight housing — typically plastic or lightweight composite to avoid adding significant weight to the grinder
– Nozzle or hose fitting — directs airflow to a usable point rather than dispersing it around the fan housing
– Compact storage — small enough to keep in a drawer or tool bag alongside other grinder accessories
Manufacturer specifications for airflow, RPM compatibility, and vacuum suction are not standardized across the category, so always check the listing for the specific kit and grinder pairing you’re considering rather than assuming performance carries over from one brand to another.
Advantages
– Converts a tool you already own. No need to buy and store a separate blower for occasional cleanup.
– Fast to deploy. Swapping a disc for the attachment takes less time than pulling out and setting up a shop vacuum.
– Saves shop space. One less standalone tool taking up a shelf or outlet.
– Reasonably priced. These kits are inexpensive compared to a dedicated blower or vacuum system.
– Useful for interior and corner cleaning. A focused nozzle can reach into cabinet corners, machine housings, and other tight spots that a bulky vacuum hose can’t easily access.
Compatible Materials
This attachment is suited to light, dry debris typical of woodworking shops:
– Sawdust from table saws, miter saws, and circular saws
– Wood chips and shavings from routers and planers
– Loose sanding dust
– Light debris on workbenches and machine tables
It is not designed for wet material, heavy metal shavings, concrete dust, or anything requiring filtered extraction. Compatibility with specific materials also depends on the attachment design, so this should be treated as a general guide rather than a guarantee.
Common Applications
– Clearing sawdust off a table saw or miter saw after a cutting session
– Blowing chips out of a router table base and fence area
– Cleaning cabinet interiors before glue-up or finishing
– Clearing plywood and MDF dust off a workbench between operations
– Quick cleanup around a circular saw’s base plate and blade guard
– General garage and DIY workshop tidy-up between projects
Who Should Buy This Attachment?
This attachment makes sense for:
– Hobbyist woodworkers who want a quick way to clear sawdust without a second appliance
– Cabinet makers who need to blow dust out of tight interior corners and joints
– DIYers with a garage workshop who already own a compatible angle grinder
– Anyone looking for a low-cost, space-saving cleanup solution for light, dry debris
Buying Guide
A few practical points to check before purchasing:
– Confirm grinder compatibility. Attachments are usually sized for specific spindle threads or body diameters — check your grinder’s specs against the listing.
– Decide if you need vacuum mode. Not all kits include it. If you only need blowing function, a simpler blower-only kit may be cheaper and lighter.
– Check the housing material. A more durable housing will hold up better to shop use over time, though this is a general durability consideration rather than a tested claim about any specific product.
– Read the manufacturer’s compatibility list. Since specifications and fitment vary between brands and grinder models, don’t assume a kit that worked with one grinder will fit another without checking.
– Set realistic expectations. This is a light-duty accessory. If your shop generates heavy dust volume daily, budget for a proper vacuum or extractor instead, or in addition.
Step-by-Step Installation Guide
Installation steps vary between kits, but the general process looks like this:
1. Unplug or remove the battery before doing any attachment work. Never install accessories on a powered tool.
2. Remove the existing disc and guard using the spindle lock and wrench provided with the grinder.
3. Attach the fan unit to the spindle, following the manufacturer’s torque and orientation instructions for that specific kit.
4. Fit the nozzle or hose adapter, making sure it’s seated securely.
5. Check clearance around the housing so it doesn’t rub the grinder’s guard or body.
6. Do a short low-speed test run before running at full RPM, checking for vibration or unusual noise.
7. Reassemble the standard guard if the design allows for it, for added protection.
If anything feels loose or doesn’t match the fitment described by the manufacturer, stop and recheck compatibility rather than forcing the installation.
Maintenance
– Clean dust and debris out of the fan housing regularly — trapped dust can affect balance and airflow over time.
– Inspect the mounting threads or clamp points periodically for wear, since repeated attach/detach cycles put stress on these connections.
– Store the attachment somewhere dry and free of dust buildup between uses.
– Check for cracks in the housing, particularly with plastic components, before each use.
Safety Tips
– Always disconnect power before attaching or removing the fan unit.
– Wear eye protection — even in blower mode, airflow can kick up debris unpredictably.
– Wear a dust mask when blowing fine sawdust, especially MDF and particle board dust, which can be more irritating to breathe than solid wood dust.
– Keep the nozzle pointed away from your face and away from other people in the shop.
– Don’t exceed the RPM rating of the attachment — check it against your grinder’s speed settings.
– Never use this attachment as a substitute for proper eye and respiratory protection during actual cutting operations.
Common Mistakes
– Assuming one kit fits all grinders. Thread sizes and body diameters differ between brands and models.
– Using it on wet or heavy debris. This attachment is built for light, dry material — not metal shavings, wet sawdust, or masonry dust.
– Skipping the test run. A quick low-speed check catches balance issues before they become a problem at full RPM.
– Treating it as a replacement for dust collection during cutting. It’s a cleanup tool for after the fact, not a substitute for at-source extraction.
– Ignoring housing wear. A cracked or loose housing at high RPM is a safety risk, not just a performance issue.
Troubleshooting
Attachment vibrates excessively. Check that it’s seated correctly on the spindle and that the mounting hardware is torqued to the manufacturer’s specification. Vibration can also indicate a damaged fan blade.
Weak airflow. Confirm the fan housing isn’t clogged with built-up dust, and check that the nozzle isn’t obstructed.
Attachment won’t fit the grinder. Double check the spindle thread size and body diameter against the manufacturer’s compatibility chart — this is the most common fitment issue.
Vacuum mode isn’t pulling debris. Confirm the hose connection is sealed and that the kit you purchased actually supports vacuum function, since not all kits do.
Angle Grinder Blower Attachment vs Electric Air Blower
A dedicated electric air blower has its own motor built for continuous airflow, generally more consistent power delivery, and is designed specifically for moving air rather than repurposed from a cutting tool. An angle grinder attachment, by contrast, depends entirely on the grinder it’s mounted to and is intended for occasional, light-duty use rather than sustained blowing sessions.
If you need reliable, repeatable blower performance every day, a dedicated electric blower is the better long-term investment. If you already own a grinder and only need occasional cleanup, the attachment is a reasonable lower-cost alternative.
Angle Grinder Blower Attachment vs Shop Vacuum
A shop vacuum is built around filtration, suction motor power, and a collection tank designed to handle continuous volume, including fine dust. An angle grinder vacuum attachment, where available, offers light suction without the filtration or capacity of a real shop vacuum.
For serious dust removal — especially fine MDF or sanding dust that affects air quality — a shop vacuum with proper filtration is the right tool. The grinder attachment is better suited to quick surface cleanup than to genuine dust extraction.
Angle Grinder Blower Attachment vs Dust Shroud
A dust shroud is a different category of accessory entirely — it attaches around a grinding or cutting disc to capture dust at the source, usually connected to a vacuum during the cutting operation itself. The blower/vacuum attachment covered in this guide is used after the fact, for general cleanup, not for capturing dust while cutting.
If your priority is reducing airborne dust during grinding or cutting work, a dust shroud paired with vacuum extraction addresses that need directly. This attachment addresses a different problem: clearing dust that’s already settled.
Can It Replace a Dedicated Air Blower?
For occasional, light cleanup — clearing a workbench, blowing chips off a router table, tidying a cabinet interior — this attachment can reasonably stand in for a dedicated blower, provided you already own a compatible grinder.
It’s not a full replacement if you need blower performance daily, need consistent output regardless of which tool it’s mounted to, or plan to use it for anything beyond light, dry woodworking debris. In those cases, a dedicated electric blower remains the more dependable tool.
Frequently Asked Questions (10 FAQs)
1. Will this attachment fit any angle grinder?
No. Fitment depends on spindle thread size and body diameter, which vary between brands and grinder models. Always check compatibility before buying.
2. Does it work on wet sawdust or resin buildup?
It’s designed for light, dry debris. Wet material or heavy buildup isn’t a good match for this type of attachment.
3. Can it replace my shop vacuum?
No. It offers light-duty airflow at best, without the filtration or suction capacity of a dedicated shop vacuum.
4. Is vacuum mode included with every kit?
Not necessarily. Some kits are blower-only. Check the specific listing before assuming vacuum function is included.
5. How long does installation take?
For most kits, a few minutes — similar to swapping a cutting disc, following the manufacturer’s specific instructions.
6. Is it safe to use at full grinder RPM?
Only if the attachment is rated for that speed. Check the manufacturer’s RPM rating against your grinder’s settings before running at full speed.
7. Does it help with MDF dust specifically?
Yes, blower mode is commonly used to clear fine MDF and particle board dust off cabinet interiors and joints after cutting.
8. Can I use it for cleaning electronics or delicate surfaces?
This attachment is designed for workshop debris cleanup. It’s not intended for use around electronics or delicate finished surfaces where airflow force needs precise control.
9. Do I need eye protection when using it as a blower?
Yes. Airflow can kick up debris unpredictably, so eye protection is recommended every time.
10. Is this a good option for a professional cabinet shop?
It can be a useful supplementary tool for quick cleanup, but professional shops generating significant dust volume should rely primarily on proper dust collection and shop vacuum systems, using this attachment as a convenience add-on rather than a primary solution.
Final Verdict
An angle grinder blower and vacuum attachment isn’t trying to be a shop vacuum or an industrial dust extractor, and it shouldn’t be judged against that standard. What it does well is give woodworkers and cabinet makers a fast, low-cost way to clear loose sawdust and chips using a tool they already own.
For hobbyists, DIYers, and small shop owners dealing with occasional cleanup after cutting plywood, MDF, or particle board, it’s a genuinely useful accessory. For anyone running continuous cutting operations or dealing with fine airborne dust at volume, it should be treated as a supplement to real dust collection equipment, not a replacement for it.
Match the tool to the job, and this attachment earns its place on the shop shelf.
Affiliate Disclosure
As an Amazon Associate, TOOLSCRAFTERS earns from qualifying purchases. This does not affect the price you pay and helps support our work in creating detailed woodworking guides, buying advice, and practical information for carpenters, furniture manufacturers, cabinet makers, and DIY enthusiasts. Our editorial opinions are independent and are not influenced by affiliate partnerships.
About the Author
Md Vajeed is the founder of TOOLSCRAFTERS and writes about woodworking tools, power tools, furniture hardware, cabinet-making accessories, workshop equipment, and DIY solutions. His articles focus on practical woodworking techniques, product research, and buying guides that help carpenters, cabinet installers, furniture manufacturers, workshop owners, and DIY woodworkers choose the right tools and accessories with confidence.