
Manual Nail Gun Kit with 50 Nails – Buying Guide | TOOLSCRAFTERS
Introduction
There’s a specific kind of frustration that comes from trying to hammer a nail into concrete. The nail slides sideways, the head mushrooms, and after three or four attempts you’ve either bent every nail in the box or chipped a chunk out of the wall.
A manual nail gun kit exists to fix exactly that problem.
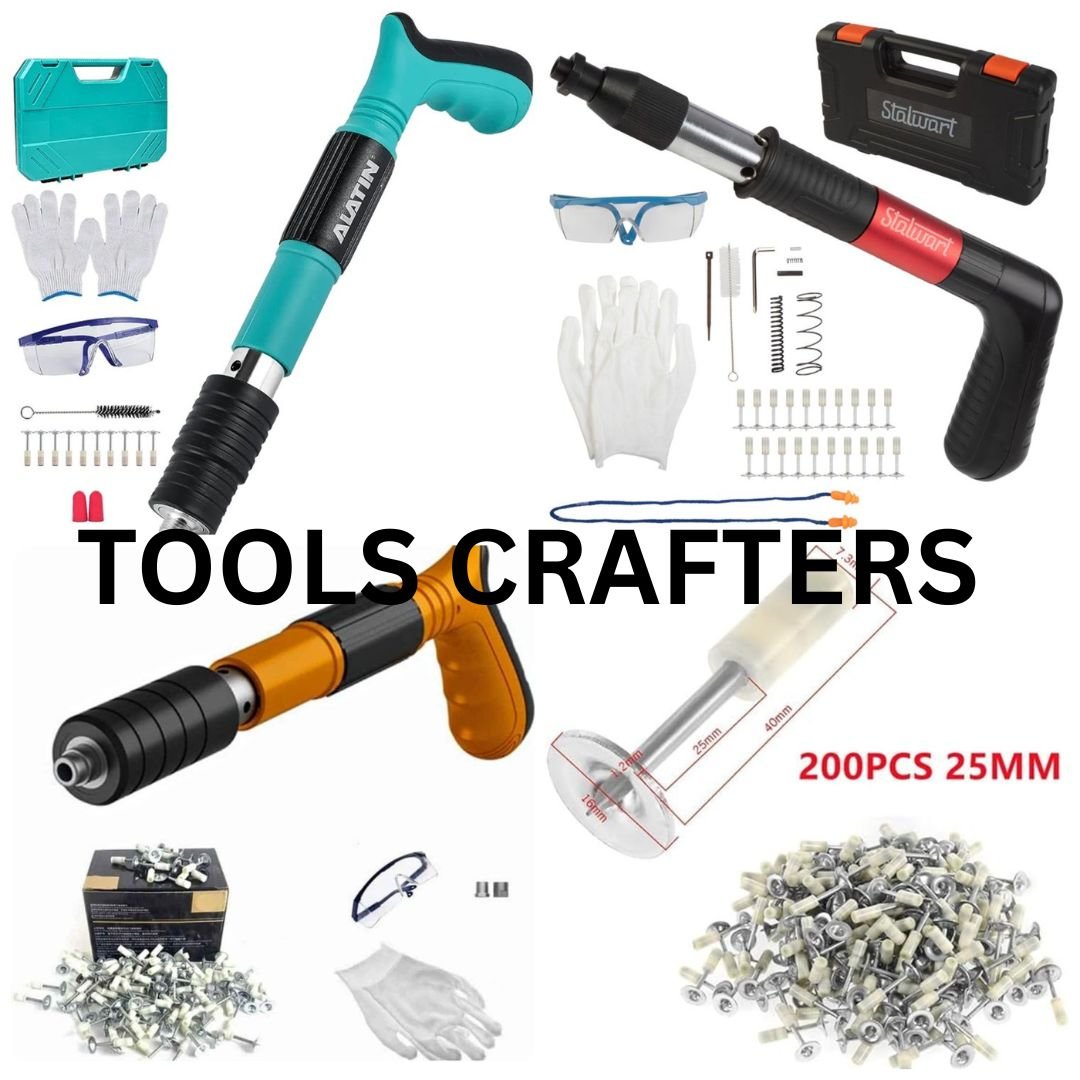
It’s a hand-operated tool built to drive hardened steel nails into concrete, brick, and masonry without needing electricity, batteries, or an air compressor. Load a nail, press the tip against the surface, strike or trigger it, and the nail goes in straight — no bending, no wasted nails, no cracked plaster.
Kits typically come with 50 nails and a case, which is enough to get through most small jobs: mounting shelving, fixing conduit clips, attaching skirting to a brick wall, or hanging a sign. This guide walks through what these tools actually do, how to pick a good one, and how to use it without hurting yourself or your wall.
Quick Features Table
| Feature | Typical Spec |
|—|—|
| Tool type | Manual (non-powered) concrete nail gun |
| Nails included | 50 hardened steel nails |
| Nail length | 1″ – 3″ (25mm–75mm) |
| Body material | Alloy or hardened steel |
| Firing method | Spring-loaded trigger or hammer strike |
| Works on | Concrete, brick, cement block, masonry |
| Power needed | None |
| Weight | 1.5–2.5 kg |
| Included extras | Carry case, sometimes safety glasses |
| Ideal user | DIYers, electricians, light contractor work |
What is a Manual Nail Gun Kit?
A manual nail gun kit is a hand-driven fastening tool designed for hard surfaces — concrete, brick, and masonry — where a standard hammer just isn’t reliable.
The “kit” usually refers to the full package: the tool body, a set of 50 concrete nails in mixed lengths, and often a molded case to keep everything together. Some kits throw in eye protection or a spare firing pin, since that’s the part most likely to wear out.
You’ll see this same category of tool sold under a few different names — wall nail gun, concrete nail gun, manual concrete nail gun. Functionally, they’re the same thing: a hand-actuated tool for driving concrete nails without power.
It sits between two extremes. A hammer and masonry nail is cheap but unreliable on hard surfaces. A powder-actuated or pneumatic nailer is fast and powerful but expensive and overkill for occasional use. The manual nail gun kit covers the middle ground — reliable enough for real work, simple enough that anyone can pick it up.
How It Works
Spring-loaded models. You load a nail into the barrel, press the tip firmly against the wall, then pull a trigger or strike the rear cap with a hammer. This releases an internal spring-loaded pin that delivers one sharp, concentrated hit to the nail head, driving it in with a single motion.
Hammer-actuated models. Simpler kits skip the spring mechanism entirely. You still load the nail into the barrel, but you strike the back of the tool directly with your own hammer. The tool’s job is to hold the nail perfectly straight and transfer your hammer force efficiently into the tip.
Why it beats a bare hammer. Three things make the difference — the nail stays perpendicular to the surface the entire time, the force lands exactly on the nail head instead of glancing off, and your fingers are nowhere near the point of impact. That’s why you get straighter drives, fewer bent nails, and less damage to the wall around the nail.
Key Features
Nail Length Range
Most tools accept nails from 1 to 3 inches. Check whether the barrel adjusts for different lengths or is fixed to a single size — this matters if you’re fastening through varying material thicknesses.
Body Construction
Hardened or alloy steel bodies hold up to repeated impact. Cheaper cast metal tends to warp or crack after a few dozen hard concrete strikes.
Grip Design
A textured or rubberized handle matters more than it sounds, since your free hand is swinging a hammer close to the tool.
Safety Guard
Better kits have a front shield that blocks debris or nail fragments from kicking back toward your hand on a bad strike.
Nail Quality
The bundled nails should be case-hardened steel. Soft or mild steel nails bend on contact with dense concrete, which defeats the entire purpose of buying the tool.
Case and Storage
A molded carry case isn’t just convenience — it keeps nails sorted by length and protects the striking mechanism between uses.
Common Uses
Electrical work. Electricians rely on these for clipping conduit, cable trays, and junction boxes to concrete or brick.
Wall-mounted fixtures. Shelves, brackets, and light fittings on masonry where drilling and plugging feels excessive for the load.
Skirting and battens. Fixing timber trim directly onto plastered brick walls.
Signage. Mounting nameplates or small signs to exterior concrete or brick.
Formwork and temporary fixing. Contractors use these for quick, semi-permanent fastening during a build.
General home repairs. Anything from a loose bracket to a garden hose reel mounted on a masonry wall.
Pros & Cons
Pros
No power source required — usable anywhere, anytime.
Lightweight and portable, most kits under 2.5 kg.
Cheaper upfront and cheaper to run than pneumatic or powder-actuated tools.
Simple learning curve — no trigger sequencing or gas cartridges to manage.
Solid choice for light-to-medium masonry fastening.
Cons
Physically tiring for high-volume use compared to powered tools.
Not practical for a contractor driving hundreds of nails a day.
Struggles on very dense, old, or high-PSI concrete — nails can bend.
Shorter nail length range than pneumatic systems.
Takes a few tries to get a clean, confident strike as a beginner.
Safety Tips
Wear eye protection every time. Concrete chips and occasional nail fragments can eject on impact. This isn’t optional, even for a two-minute job.
Scan the wall first. Check for hidden wiring or plumbing before nailing into any wall, especially near switches, outlets, or plumbing runs.
Keep your free hand well clear of the firing tip at all times, even when the tool “should” be safe.
Inspect before use. A worn firing pin or cracked barrel causes misfires — replace it, don’t push through a few more jobs on a damaged tool.
Match nail length to material thickness. An oversized nail in thin masonry can punch straight through to the other side.
Skip reinforced concrete with heavy rebar. You risk nail deflection, tool damage, and an unpredictable strike.
Store nails away from the tool when not in use to avoid accidental loading.
Never point it at another person, loaded or not.
Buying Guide
Match It to Your Actual Workload
Occasional home DIY? A basic hammer-actuated kit is enough. Using it weekly for trade work? Get a spring-loaded model with a hardened steel body.
Confirm Nail Compatibility
Make sure the barrel takes standard 1″–3″ concrete nails, and check that replacements are easy to find locally — you won’t want to be stuck once the 50 included nails run out.
Weigh Build Quality Against Price
A slightly pricier alloy steel kit will outlast several budget versions. Scan reviews specifically for complaints about bent barrels or snapped pins before buying.
Check Grip and Guard
Look closely at product photos or handle it in person if you can. A textured grip and front safety guard are worth prioritizing over cosmetic extras.
Look at What’s Actually Included
A case, spare firing pin, and safety glasses add real value — compare the full package, not just the price tag.
Read Real Buyer Feedback
Focus on reviews that mention nail bending on hard concrete or early misfires. That tells you more about long-term reliability than any spec sheet.
Maintenance
Wipe it down after every use. Concrete dust is abrasive and speeds up wear if it’s left sitting inside the mechanism.
Oil the moving parts occasionally. A light machine oil on the spring (for spring-loaded models) keeps the action smooth and prevents rust buildup.
Check the firing pin regularly. It’s the component most likely to chip or wear down — replace it at the first sign of deformation.
Store it somewhere dry. Moisture is the biggest threat to the steel components; avoid damp sheds or garages where possible.
Keep spare nails dry and separated from other tools to prevent rust and scratching.
Handle drops seriously. Even if the outside looks fine, a hard drop can knock the internal mechanism out of alignment.
Frequently Asked Questions
1. Does a manual nail gun kit work on solid poured concrete?
Yes, most kits are built for exactly that. Very dense or old, high-strength concrete may still bend nails, in which case a powered tool is a better fit.
2. Do I need a compressor or battery for this tool?
No. That’s the whole appeal — it runs purely on manual or hammer-driven force, no power source needed.
3. What nail lengths come in a standard 50-nail kit?
Most kits include a mix, typically 1 to 2.5 inches, suited to general wall-mounting and fastening jobs.
4. Is this suitable for professional contractor use?
It handles light-to-medium volume work well — conduit fixing, trim, small fixtures. For high daily nail counts, a powder-actuated tool will save time and effort.
5. Does it work on brick and cement block too, or just concrete?
Yes, it generally works across concrete, brick, and cement block, which is part of why it’s such a common general-purpose masonry tool.
6. How many nails will 50 actually cover?
Enough for most small-to-medium jobs. Replacement nails are widely sold separately once you run through the included set.
7. Is it beginner-friendly?
Yes. With eye protection and attention to basic safety steps, it’s much easier to learn than a powered nailer.
8. What’s the difference between a “wall nail gun” and a “manual concrete nail gun”?
Usually none functionally — these are just different names for the same category of tool, varying by brand and region.
Final Verdict
A manual nail gun kit isn’t meant to compete with pneumatic or powder-actuated tools, and it doesn’t need to. For the kind of fastening most homeowners, electricians, and small contractors actually deal with — shelving, conduit, trim, signage — it offers real control and consistency without the setup or cost of a powered system.
If your work is occasional-to-regular masonry fastening rather than high-volume production nailing, a well-built manual concrete nail gun with a solid 50-nail kit is a smart, low-maintenance tool to keep on hand. Buy based on build quality over price, follow the safety basics, and it’ll last for years.
Affiliate Disclosure
TOOLSCRAFTERS.COM may earn a commission from qualifying purchases made through links on this page, at no extra cost to you. We only recommend products we believe offer real value, based on research and hands-on use where possible. This helps us keep producing free, practical guides.
About the Author
TOOLSCRAFTERS Editorial Team
The TOOLSCRAFTERS Editorial Team is made up of tool enthusiasts, DIY practitioners, and contributors with hands-on trade experience. We research and test hardware, hand tools, and power tools to give readers straightforward, practical buying advice. Our content is reviewed regularly to stay accurate and reflect current market standards and safety practices.