
Best Drill Bit Sharpener for Wood & Metal: Complete Guide (2026)
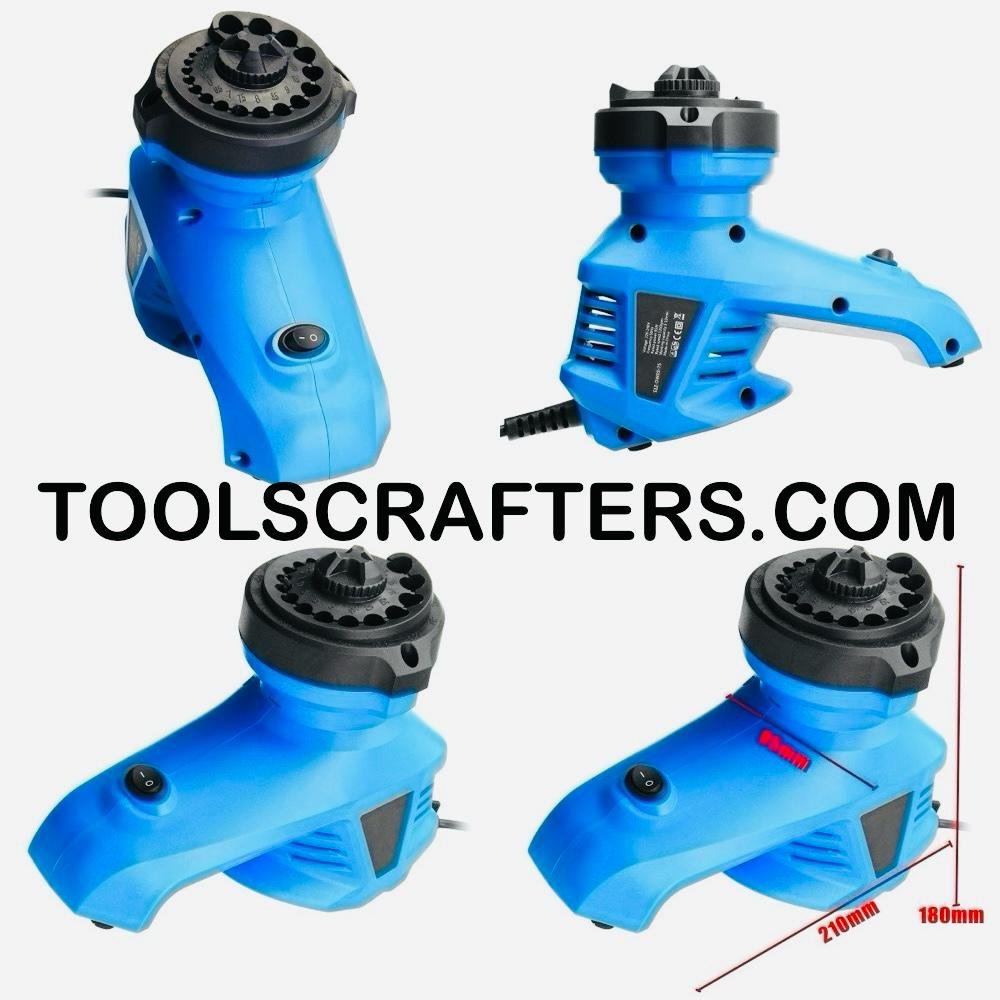
Electric Drill Bit Sharpener: Complete Guide to Restoring Dull Drill Bits
If you’ve ever leaned on a drill and felt it push back instead of bite, you already know what a dull bit feels like. The hole takes longer, the motor works harder, and the edges of the hole come out rough instead of clean. Most people’s first instinct is to toss the bit and grab a new one. In a workshop that goes through bits regularly, that adds up fast.
An electric drill bit sharpener exists to solve that problem before it becomes a recurring expense. Instead of retiring a bit the moment it stops cutting well, you regrind the cutting edges and get it back into rotation. This guide walks through what these machines actually do, which bits are realistic candidates for sharpening, how to use one without ruining a bit, and where the limits are — because there are limits, and any honest guide has to say so.
What Is a Drill Bit Sharpener?
A drill bit sharpener is a small benchtop or handheld workshop tool built specifically to regrind the cutting edges and point of a worn drill bit. Rather than freehanding the bit against an open grinding wheel, most sharpeners use a guide hole or fixture that holds the bit at a set position while a motorized grinding wheel or stone reshapes the tip.
That guide hole is really the whole point of the tool. It’s what separates a purpose-built sharpener from just holding a bit up to a bench grinder and hoping for the best. The exact number of guide holes, the sizes they accept, the wheel material, and the motor specifications all vary by manufacturer and model, so those details need to be confirmed on the specific product you’re looking at rather than assumed from one brand to another.
Some sharpeners are compact, plug-in units meant to sit on a bench or in a drawer between uses. Others are built into larger shop equipment. What they share is the same basic job: take a bit that’s gone dull from normal use and put a usable edge back on it.
Also Known As
You’ll see this tool marketed under a handful of overlapping names, all describing roughly the same category of product:
– Drill bit sharpener
– Drill bit sharpening machine
– Portable drill bit sharpener
– Twist drill bit sharpener
– Drill bit grinding machine
They’re not always identical in design, but they’re solving the same problem.
How It Works
The basic sequence is the same across most designs, even though the internal hardware differs from one machine to the next.
You select a guide hole sized for your bit’s diameter and insert the bit until it seats correctly.
With the bit held in a fixed position and angle, you bring it into contact with a spinning grinding wheel, usually rotating the bit through the hole to regrind both cutting edges evenly. The guide hole does the job a steady hand would otherwise have to do freehand — it keeps the angle consistent from one pass to the next, which is the difference between a bit that cuts straight and one that wanders or grabs unevenly.
Because the bit is registered in the same position every time, both flutes get roughly the same amount of material removed, which keeps the point centered. That’s harder to pull off consistently on an open bench grinder,
where even an experienced hand can end up with one edge slightly longer than the other.
The specific grinding angle a given machine produces, the wheel grit, and how many passes a bit typically needs are all specific to the product and the condition of the bit — this isn’t something to guess at. The manufacturer’s instructions for your particular sharpener are the right source for that, and it’s worth actually reading them rather than assuming every unit works identically.
Why Sharp Drill Bits Matter
A dull bit doesn’t just work slower — it changes how the whole job goes.
When the cutting edge loses its geometry, the bit stops shearing material cleanly and starts rubbing instead. That rubbing generates heat, and heat is what eventually ruins a bit permanently by softening the steel at the tip. In the meantime, you’re pressing harder to get the bit to bite, which increases the chance of the bit walking off your mark, breaking through material unevenly, or grabbing suddenly in soft wood.
Hole quality suffers too. A sharp bit leaves a clean, round hole with minimal tear-out on wood or a smooth bore in metal. A dull one leaves rough edges, oversized or out-of-round holes, and sometimes visible burn marks from the friction. If you’re drilling for anything that needs to fit — hinges, dowels, hardware, fasteners — that tolerance loss matters.
There’s also a labor cost that’s easy to overlook. Drilling with a dull bit simply takes longer, and that time adds up across a day of repetitive holes in a cabinet shop or maintenance route.
Signs Your Drill Bit Needs Sharpening
A few practical indicators tell you a bit is due for attention before it gets bad enough to affect your work:
– It takes noticeably more pressure to start or continue a hole than it used to.
– You’re seeing more heat and discoloration on the bit or the material during drilling.
– The hole edges are rougher or more prone to tear-out than normal.
– The bit is wandering off the mark instead of biting cleanly at the start.
– You can visually see a rounded or chipped edge instead of a crisp cutting lip when you inspect the tip closely.
– Chip or shaving formation changes — instead of clean curls or chips, you’re getting dust or fine debris, which often means the edge is rubbing rather than cutting.
None of these on their own is a certainty, but a bit showing two or three of these signs is a reasonable candidate for sharpening rather than continued use as-is.
Which Drill Bits Can Be Sharpened?
This is where honesty matters more than optimism, because trying to sharpen the wrong bit on the wrong equipment usually just ruins it faster.
– Carbide-tipped and masonry bits typically require specialized diamond-wheel equipment rather than a standard HSS-oriented sharpener. Grinding carbide on the wrong wheel tends to chip or overheat the tip rather than sharpen it.
– Broken, snapped, or badly bent bits are not fixable by sharpening. A sharpener reshapes the cutting edge and point — it does not straighten a bent shaft or repair a snapped tip.
– Severely overheated bits that have visibly discolored (a blue or purple tint from heat) have often lost their hardness at the tip. Sharpening may restore the shape, but the steel underneath may no longer hold an edge well.
– Spade bits, step bits, hole saws, and brad-point bits frequently fall outside the guide-hole design of a standard twist-bit sharpener. Some specialty sharpeners handle a wider range, but this depends entirely on the specific model.
If you’re not sure whether a bit is a reasonable candidate, it’s better to check the manufacturer’s stated compatibility for your sharpener than to find out the hard way.
Why Professionals Sharpen Drill Bits Instead of Replacing Them
In a shop that drills constantly — cabinet making, furniture production, maintenance routes, repair work — bit consumption is a real line item. Buying a fresh box of bits every time one goes dull gets expensive, and it also means someone has to notice the bit is dull, stop, find a replacement, and get back to work.
Keeping a sharpener on hand changes that workflow. A tech or fabricator can regrind a bit in the time it would take to walk to the supply cabinet, and the bit goes right back into service. Over months of use, that reduces how often bits need to be bought outright, and it cuts down on the downtime that comes from running out of a specific size mid-job.
There’s also a practical sustainability angle here that shouldn’t be oversold — resharpening a usable bit instead of throwing it out is simply less wasteful than treating every dull bit as scrap.
None of this means sharpening replaces buying new bits entirely. It’s a way of extending the useful life of bits that are otherwise still structurally sound.
Key Features to Look For
When comparing sharpeners, a few practical features are worth paying attention to — treat this as a checklist for evaluating a specific product listing, not a spec sheet for one particular machine:
– Guide hole range. How many sizes does it accommodate, and do they match the bit diameters you actually use?
– Build quality and stability. A sharpener that shifts or vibrates during use makes it harder to get a consistent result.
– Portability. Some shops want a unit that lives on one bench; others want something that moves between stations or job sites.
– Ease of setup. How straightforward is it to select the right guide hole and get a bit properly seated?
– Dust and swarf handling. Grinding produces metal or wood dust — some designs manage this better than others.
– What’s included. Manuals, collets, cleaning brushes, and spare parts availability all affect the long-term ownership experience.
Motor power, RPM, and grinding wheel material are all things to verify directly against the specific product you’re considering rather than assume are standard across the category.
Benefits
Used within its intended scope, an electric drill bit sharpener offers a handful of real, practical advantages:
– Extended bit life. Compatible bits can often be restored for continued use instead of discarded.
– Improved drilling performance. A properly sharpened edge cuts cleaner and requires less force.
– Lower replacement costs over time, particularly in shops that go through a lot of bits.
– Better hole quality, with cleaner edges and less tear-out or burning.
– Less physical effort during drilling, since a sharp bit doesn’t need to be forced through material.
These are realistic, not guaranteed, outcomes — results depend on the bit’s starting condition, the sharpener’s suitability for that bit, and how correctly the tool is used.
Common Applications
An electric drill bit sharpener shows up in a wide range of settings where drilling is a routine part of the work:
– Cabinet making and furniture manufacturing, where repeat holes for hardware and joinery are constant
– General carpentry and woodworking shops
– Maintenance departments and repair shops that need to keep tools ready between jobs
– Home workshops and DIY use, for anyone who drills often enough that buying new bits repeatedly becomes annoying
– HSS metal drilling applications, where compatible metal bits can be kept in service longer
Drill Bit Sharpener vs Bench Grinder
| Factor | Drill Bit Sharpener | Bench Grinder |
|—|—|—|
| Angle consistency | Guide hole helps standardize the angle each time | Relies entirely on the operator’s hand and eye |
| Learning curve | Generally easier for beginners to get consistent results | Takes practice; easy to ruin a bit while learning |
| Primary purpose | Built specifically for drill bit edges and points | General-purpose grinding, deburring, and shaping |
| Versatility | Narrower — focused on bits | Broader — handles a wider range of shop tasks |
| Typical setup | Often compact and dedicated to this one job | Usually a fixed bench tool used for many tasks |
Neither one replaces the other outright. A bench grinder is a general shop tool that can sharpen bits in experienced hands, while a dedicated sharpener trades some versatility for consistency and a shorter learning curve specifically for bit work.
Drill Bit Sharpener vs Buying New Drill Bits
| Factor | Sharpening | Buying New |
|—|—|—|
| Upfront cost | One-time cost of the sharpener itself | Recurring cost every time a bit dulls |
| Best suited for | Frequent drilling, shops going through many bits | Occasional or light drilling |
| Time involved | Adds a sharpening step before reuse | Bit is ready to use immediately |
| Condition limits | Only restores the edge — doesn’t fix broken or bent bits | New bit has no wear at all |
| Long-term economics | Can reduce cost per hole over sustained, regular use | Predictable cost, but it keeps recurring |
For a shop that dulls bits regularly, the math tends to favor sharpening over time. For someone who drills a handful of holes a year, a sharpener may be more tool than the situation calls for — buying a replacement bit when needed is simpler.
Buying Guide
Before buying a drill bit sharpener, it helps to answer a few honest questions about how you actually work:
What bit types and sizes do you use most? If your work is mostly standard HSS twist bits in a handful of common sizes, make sure the guide holes on the sharpener you’re considering actually cover that range.
How often do your bits actually go dull? If you’re drilling daily in cabinet or furniture production, a sharpener earns its keep quickly. If drilling is occasional, weigh the cost against how many bits you’d realistically resharpen.
Do you need portability, or will it live on one bench? Some users move between job sites or stations; others have a dedicated sharpening station that never moves.
What’s your budget, and what does that get you? Compare guide hole range, build quality, and included accessories across models rather than choosing on price alone.
Whatever you choose, verify the manufacturer’s stated bit compatibility, wheel type, and included instructions directly on the product listing — that information is specific to each model and shouldn’t be assumed from a general description like this one.
Step-by-Step Sharpening Guide
This is a general process. Always follow the specific instructions included with your sharpener, since guide hole selection and operation vary by model.
1. Inspect the Bit First
Before sharpening anything, check whether the bit is actually a good candidate. Look for bending, cracking, or breakage — none of which sharpening will fix.
2. Choose the Correct Guide Hole
Match the bit’s diameter to the appropriate guide hole on the sharpener. Using the wrong size can produce an uneven or incorrect edge.
3. Seat the Bit Securely
Insert the bit fully and make sure it’s held firmly according to the sharpener’s design before starting the motor.
4. Sharpen in Short, Controlled Passes
Rather than grinding continuously, most sharpeners work best with brief passes, checking the edge periodically rather than removing too much material in one go.
5. Check the Edge and Point
Stop periodically to inspect both cutting edges. They should look even, with the point centered rather than off to one side.
6. Deburr and Clean the Bit
Once sharpened, clean off any grinding debris and remove any small burrs left on the edge.
7. Test Before Full Use
Run the bit on a scrap piece of material first to confirm it’s cutting properly before putting it back into regular production use.
Maintenance
Keeping a sharpener in good working order isn’t complicated, but it’s easy to neglect:
– Keep the grinding wheel or stone clean and free of built-up dust or metal debris, which can affect grinding consistency.
– Store the unit in a dry area to prevent rust on the wheel and housing, especially in metalworking environments.
– Periodically inspect guide holes for wear, since repeated use can gradually widen them.
– Follow the manufacturer’s specific maintenance schedule and part-replacement guidance for your model — these details vary and should come from the actual product documentation.
Safety Tips
– Wear eye protection any time the sharpener is running — grinding produces sparks and fine debris.
– Unplug the unit before adjusting guide holes, cleaning it, or performing any maintenance.
– Keep hands and loose clothing clear of the grinding wheel at all times.
– Tie back long hair and remove loose jewelry before operating the machine.
– Never force a bit into a guide hole that doesn’t fit — this can damage both the bit and the machine.
– Let the wheel come to a complete stop before touching it or removing debris near it.
– Work on a stable, level surface so the sharpener doesn’t shift during use.
Common Sharpening Mistakes
– Using the wrong guide hole for the bit’s actual diameter, which produces an inconsistent or off-center edge.
– Over-grinding. Removing too much material in one session shortens the bit’s usable length and life unnecessarily.
– Skipping the deburring step, leaving small burrs that affect how cleanly the bit drills afterward.
– Trying to sharpen incompatible bit types — like masonry or carbide bits — on a sharpener meant for standard HSS bits.
– Not securing the bit properly, which can produce an uneven grind or, in some cases, damage the bit.
– Ignoring the manufacturer’s instructions in favor of guessing at the process, especially for a first-time user unfamiliar with that specific model.
Troubleshooting
The bit still doesn’t cut well after sharpening.
This usually points to either the wrong guide hole being used, a bit that was too far gone to fully restore, or a bit material that isn’t well-suited to this type of sharpener.
The edges look uneven after grinding.
Often caused by the bit not being fully seated in the guide hole before grinding began.
There’s excessive sparking or heat during sharpening.
This can indicate too much pressure or too fast a feed rate. Easing off and using shorter passes usually helps.
The sharpener isn’t grinding at all.
Check the power connection first, then inspect the wheel for visible damage or heavy debris buildup. For anything beyond a basic check, refer to the manufacturer’s troubleshooting guidance for your specific model rather than guessing at internal causes.
Limitations
An electric drill bit sharpener is a useful tool, not a universal fix. It restores cutting edges and points on compatible bits — it does not repair structural damage, does not work equally well on every bit material, and won’t turn a badly worn or overheated bit back into new condition. Treating it as a tool with a specific, defined job tends to produce better results than expecting it to save every bit that comes across the bench.
When Replacing a Drill Bit Is Better Than Sharpening
Sharpening isn’t always the right call. It generally makes more sense to replace a bit outright when:
– The bit is bent, cracked, or has a broken tip
– The bit has been severely overheated and shows heavy discoloration
– The bit type isn’t compatible with the sharpener you have on hand
– The bit is already undersized from repeated previous sharpening
– The cost and time of resharpening outweighs the low cost of a basic replacement bit for occasional use
There’s no shame in retiring a bit. Sharpening is about extending useful life, not forcing a worn-out tool to keep going past the point of sense.
Frequently Asked Questions
Can all drill bits be sharpened?
No. Standard HSS twist bits are generally the most common candidates, but compatibility depends on the specific sharpener and the bit’s condition. Carbide, masonry, and several specialty bit types typically fall outside what a standard sharpener handles.
How do I know when a drill bit needs sharpening?
Watch for increased pressure needed to drill, more heat during use, rougher hole edges, or a visibly rounded or chipped cutting edge.
Can a drill bit sharpener fix a broken or bent bit?
No. Sharpening restores the cutting edge and point geometry — it can’t straighten a bent shaft or repair a snapped bit.
Can you sharpen masonry or carbide-tipped bits with a standard sharpener?
Generally not recommended. Those bit types usually need specialized diamond-wheel equipment rather than a typical HSS-focused sharpener.
How often should drill bits be sharpened?
There’s no fixed schedule — it depends on how heavily the bits are used and the material being drilled. Sharpen based on performance signs rather than a set interval.
Is a drill bit sharpener worth it for occasional DIY use?
It can be, but for very light or infrequent drilling, simply replacing a dull bit when needed may be more practical than investing in a dedicated sharpener.
What’s the difference between a drill bit sharpener and a bench grinder?
A sharpener uses guide holes to standardize the angle for bit-specific work, while a bench grinder is a general-purpose tool that relies on the operator’s technique.
Do drill bit sharpeners work on both wood and metal bits?
Many standard twist bits used for wood and HSS metal bits can often be sharpened on the same type of machine, but this depends on the specific sharpener’s guide hole compatibility.
How long does it take to sharpen a drill bit?
This varies by bit condition and the specific machine, but the process is generally quick compared to buying and waiting for a replacement.
Can over-sharpening damage or shorten a drill bit’s life?
Yes. Removing too much material in repeated sharpening sessions shortens the usable length of the bit over time and can weaken it.
Final Verdict
For anyone who drills often enough to notice bits going dull on a regular basis — cabinet shops, furniture makers, maintenance departments, and serious DIYers — an electric drill bit sharpener is a reasonable, practical investment that can meaningfully cut down on replacement costs and downtime. For someone who drills occasionally and rarely dulls a bit past usefulness, a basic replacement bit when needed is probably the simpler and more cost-effective route. The right choice comes down to how often you actually use your bits, not how appealing the idea of sharpening them sounds.
Affiliate Disclosure
As an Amazon Associate, TOOLSCRAFTERS earns from qualifying purchases. This does not affect the price you pay and helps support our work in creating detailed woodworking guides, tool reviews, buying advice, and practical workshop content. Our editorial opinions are independent and are never influenced by affiliate partnerships. We recommend products based on their intended applications, features, and overall value to help carpenters, furniture manufacturers, contractors, DIY enthusiasts, and workshop professionals make informed purchasing decisions.
About the Author
About the Author
Md Vajeed is the founder of TOOLSCRAFTERS and writes about woodworking tools, power tools, drill accessories, cabinet-making equipment, furniture hardware, and practical workshop solutions.
His articles focus on accurate, easy-to-understand buying guides and real-world tool applications for carpenters, furniture manufacturers, maintenance professionals, electricians, contractors, and DIY enthusiasts. Every article is carefully researched to provide honest, practical information rather than marketing claims.